Build Introduction
The Flurry Rogue build rapidly stabs every foe in range.  Flurry penetrates through every enemy in range with multiple hits.
  Aspect of Encircling Blades enables Flurry to deal damage in a massive circular Area of Effect (AoE) around the player.
 ![]() Deathmask of Nirmitruq enables the Rogue to consume Life for more power.
Deathmask of Nirmitruq enables the Rogue to consume Life for more power.
The only starting requirement for this endgame build guide is a Level 60 character. Check the Rogue Leveling Guide if you need help getting there.
Check the build tier lists to see how this build compares to others on Icy Veins.
Strengths and Weaknesses
- High area damage to clear packs
- Rapid movement with Flurry teleport
- Can crowd control an entire pack of enemies
- Lower single-target damage than Twisting Blades, Rapid Fire, Barrage
- Requires melee range
- Crowd control dependent on procs
Quick Navigation
Want to skip ahead? Use the table below to jump to sections.
Skill Bar and Skill Tree Points
The Skill Tree above shows the full allocation of 71 Skill Points for the Flurry Rogue build. Leveling up grants 59 points. The remaining 12 points are gained from completing Renown for Eternal Players and Seasonal Rank/Journey for Seasonal Players.
Once you obtain and equip ![]() Deathmask of Nirmitruq, reallocate Skill Points from
Deathmask of Nirmitruq, reallocate Skill Points from ![]() Innervation (3) to
Innervation (3) to ![]() Siphoning Strikes (3).
Siphoning Strikes (3).
![]() Momentum is recommended as the starting Key Passive. Check the Momentum and Close Quarters Combat Variants section for details on the advanced version of the build.
Momentum is recommended as the starting Key Passive. Check the Momentum and Close Quarters Combat Variants section for details on the advanced version of the build.
![]() Dark Shroud is not equipped on the Skill Bar. It is instead automatically activated by
Dark Shroud is not equipped on the Skill Bar. It is instead automatically activated by  Umbrous Aspect.
Wondering what comes after Level 60? Head to the Paragon Board section to power up the build even further. If you want to see how everything plays out in combat, check out the Rotation and Playstyle section for a quick breakdown.
Rogue Class Mechanic – Specialization
Combo Points is the preferred Specialization for general farming due to the burst damage playstyle of Flurry Rogue. Build Combo Points with  Puncture to unleash additional damage for
  Flurry.

Gear, Stats, Gems, and Runes
The following sections cover the important systems that are essential to improving the power of your character in the endgame of Diablo 4.
Legendary Aspects
Listed below are all the best-in-slot Aspects for the Flurry Rogue build. Salvage Legendary Items with higher Aspect values to unlock them in the Codex of Power, and then imprint them onto Legendary Items with the preferred affixes. For the best results, combine these Aspects with the ideal Stat Priorities.
| Gear Slot | Aspect Name | Aspect Power |
|---|---|---|
| Ranged Weapon |  Aspect of Encircling Blades Aspect of Encircling Blades | Flurry damages enemies in a circle around you and deals x [35 – 55%] increased damage. |
| Amulet |  Aspect of the Dark Dance Aspect of the Dark Dance | Every 5 seconds, your next Core Skill costs [X] Life instead of Primary Resource. Will only occur if you have at least 60% of your Maximum Life. Skills that consume Life deal x80% bonus damage. |
| Dual-Wielded Weapon Slot #1 (replaced by |  Aspect of the Expectant Aspect of the Expectant | After attacking enemies with a Basic Skill, increase the damage of your next Core Skill cast within 5 seconds by x [5 – 12%], up to x30%. |
| Gloves (replaced by |  Frostbitten Aspect Frostbitten Aspect | Enemies hit by your Grenade Skills have a chance equal to your Critical Strike Chance to be Frozen for 2 seconds. You deal x [10 – 30%] increased Critical Strike Damage against Frozen or Stunned enemies. |
| Dual-Wielded Weapon Slot #2 or Ring Slots |  Aspect of Retribution Aspect of Retribution | Distant enemies have a 10% chance to be Stunned for 2 seconds when they hit you. You deal [15 – 35%] increased damage to Stunned and Knocked Down enemies. |
| Dual-Wielded Weapon Slot #2 or Ring Slots |  Coldclip Aspect Coldclip Aspect | You deal x [20 – 40%] increased damage to enemies that are Chilled or Frozen. Your Basic Skills are always Cold Imbued at 50% potency and gain this damage bonus against Bosses. |
| Dual-Wielded Weapon Slot #2 or Ring Slots |  Breakneck Bandit’s Aspect Breakneck Bandit’s Aspect | Flurry deals x [35 – 55%] increased damage and has a 20% chance to Stun enemies for 3 seconds with each hit. |
| Helm (replaced by |  Aspect of Might Aspect of Might | Basic Skills grant 20% Damage Reduction for [2 – 10] seconds. |
| Chest (replaced by |  Cheat’s Aspect Cheat’s Aspect | You gain [5 – 15%] increased Damage Reduction and +10% increased Movement Speed. These bonuses are doubled while below 50% Maximum Life. |
| Pants |  Umbrous Aspect Umbrous Aspect | Lucky Hit: Critical Strikes have up to a [45 – 65%] chance to grant a free Dark Shroud shadow. |
| Boots |  Wind Striker Aspect Wind Striker Aspect | Critical Strikes grant [8.5 – 19%] Movement Speed for 1 second, up to 6 seconds. |
Stat Priority and Tempering Affixes
Listed below are the affixes to prioritize on gear for Flurry Rogues, ranked by importance. Affixes on the same line have equal value, so attempt to obtain all affixes in each line before moving on to the next.
Ensure you apply a Tempering affix to your endgame items. If you have a surplus of crafting materials, reroll Tempering affixes on your best items until they upgrade to a Greater Affix.
Bolded affixes are the most important targets for the Capstone Bonus from Masterworking. Capstone Bonuses are granted after Masterworking 25% Quality and can be re-rolled for a cost. For more details, check the Tempering and Masterworking guides.
Stack Damage to Close Enemies to make the switch from ![]() Momentum to
Momentum to ![]() Close Quarters Combat.
Close Quarters Combat.
Equip Daggers for the Damage to Close Enemies implicit stat to scale the bonus damage of ![]() Close Quarters Combat. A Bow is preferred over a Crossbow for a faster Attack Speed if using
Close Quarters Combat. A Bow is preferred over a Crossbow for a faster Attack Speed if using ![]() Heartseeker to activate the Marksman requirement of Close Quarters Combat.
Heartseeker to activate the Marksman requirement of Close Quarters Combat.
↑ Back to Legendary Gear Table
| Slot | Gear Affixes | Tempering Affixes |
|---|---|---|
| Weapons | 1. Dexterity, Maximum Life, Vulnerable Damage or Critical Strike Damage 2. Resource Cost Reduction (Ranged Weapon), Lucky Hit Chance to Restore Primary Resource, Damage | |
| Helm | 1. Cooldown Reduction 2. Resistances or Armor 3. Dexterity, Maximum Life | |
| Chest | 1. Ranks to Dark Shroud 2. Resistances or Armor 3. Dexterity, Maximum Life | |
| Gloves | 1. Ranks to Flurry, Critical Strike Chance, Attack Speed 2. Resistances or Armor 3. Dexterity, Maximum Life | |
| Pants | 1. Resistances or Armor 2. Dexterity, Maximum Life | |
| Boots | Implicit Stat: Attacks Reduce Evade’s Cooldown 1. Movement Speed 2. Resistances or Armor 3. Dexterity, Maximum Life, Ranks to Dash | |
| Amulet | 1. Ranks to Frigid Finesse 2. Ranks to Unstable Elixirs, Weapon Mastery, Exploit, or Malice 3. Cooldown Reduction, Critical Strike Chance, Attack Speed | |
| Rings | 1. Critical Strike Chance, Attack Speed 2. Resistances 3. Dexterity, Maximum Life, Resource Cost Reduction |
Uniques and Mythic Uniques
Listed below are the recommended and optional Unique and Mythic Unique Items for the Flurry Rogue build. Each item description includes the most important affix to target for Masterworking upgrades. Check the Mythic Unique Items Guide for information on target-farming them.
 Condemnation (recommended) provides increased damage and reduces the Basic Skills cast between Core Skills from 3 to 1.
 - Masterworking Priority: Basic Skill Attack Speed
 Deathmask of Nirmitruq (recommended) provides a massive amount of Increased Damage and Attack Speed.
 - Masterworking Priority: Ranks to Flurry
 Heir of Perdition (optional) is an alternative option if you do not want to consume Life with
  Deathmask of Nirmitruq.
 - Masterworking Priority: Ranks to Core Skills
 Ring of Starless Skies (optional) should only be equipped if you are not utilizing the
  Deathmask of Nirmitruq setup, as Life is spent instead of Energy.
 - Masterworking Priority: Ranks to Core Skills
 Shroud of False Death (recommended) provides the highest damage increase in the slot due to the +1 Ranks to All Passives inherent affix.
 - Masterworking Priority: All Stats
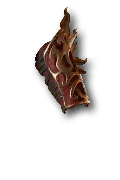 Fists of Fate (recommended) provides up to a 50% overall damage increase in its unique effect and a high amount of Lucky Hit Chance.
 - Masterworking Priority: Critical Strike Chance or Attack Speed
Gems and Runewords
Listed below are the recommended Gems and Runewords to socket into your gear.
Gems
Equip the corresponding Gems into your Weapon, Armor, and Jewelry slots.
| Weapon Gems | Armor Gems | Jewelry Gems |
|---|---|---|
| Any Gem with your lowest Resistance. |
Runewords
Insert one of the following Runewords, consisting of a Rune of Ritual and a Rune of Invocation, into your equipped Ranged Weapon. The other Runeword can be inserted into any equipped Helm, Chest, or Pants item. Add sockets to your equipment at the Jeweler if necessary. Check the Runewords Guide for more details.
| Runewords | Effects |
|---|---|
| Gain: 10 Offering — Inflict a Crowd Control. Gain double offering if it isn’t a Slow or a Chill. Requires: 300 Offering, Cooldown: 3 Seconds — Invoke the Spiritborn’s Vortex, dealing damage and Pulling In enemies. | |
| Gain: 300 Offering — Cast 5 Skills then become exhausted for 3 seconds. Requires: 100 Offering, Cooldown: 5 Seconds — Gain +1 to Skills for 10 seconds. |
Paragon Board
Use the following Paragon Boards, Legendary Nodes, and Glyphs for the Flurry Rogue.
![]() Combat is socketed in the Base Setup to assist with Energy generation when first starting the build. The Full Setup sockets
Combat is socketed in the Base Setup to assist with Energy generation when first starting the build. The Full Setup sockets ![]() Turf instead once
Turf instead once ![]() Deathmask of Nirmitruq is obtained and equipped.
Deathmask of Nirmitruq is obtained and equipped.
Season 11 Mechanics
Season 11: Divine Intervention offers a seasonal theme that can be utilized to enhance this build. Access Divine Gifts from the tab in the character sheet, and apply Sanctification on your items for additional bonuses.
Divine Gifts
Obtain the Divine Gifts of Lesser Evil bosses by defeating them for the first time, and then level up equipped Divine Gifts by killing the associated Lesser Evil or any of their minions. Insert the following Divine Gifts setups into Purified sockets, unlocked by progressing through the Seasonal Reputation Board, to gain beneficial rewards for specific activities.
- Helltides – Duriel
- Purified: Essence of Pain – Briefly gain maximum Barrier after becoming Injured, every 20 seconds.
- Corrupted: Essence of Squallor
- World Bosses – Azmodan
- Purified: Essence of Sin – Gain 20% increased Armor.
- Corrupted: Essence of Hellfire
- Kurast Undercity – Andariel
- Purified: Essence of Anguish – Gain 30% Movement Speed.
- Corrupted: Essence of Screams
- Note: If you are already move speed capped or need extra defense, swap the Andariel Gifts for a 20% Resistance boost to defense.
- Belial – The Pit
- Purified: Essence of Lies – Fortify for 1% of your Maximum Life a second.
- Corrupted: Essence of Shadows
Sanctification
Use Heavenly Sigils to sanctify your items at the Heavenly Forge for a chance to apply one of the outcomes listed below. Sanctification makes the item unmodifiable, so ensure all other item crafting is finalized.
- Apply a bonus Legendary power
- Improve an Affix into a Greater Affix
- Add a bonus Affix from a pool of special Sanctification affixes
- Replace an existing Affix with a random Sanctification affix
- Add a random amount (5-25) of bonus Quality
Some of the jackpot desirable Sanctifications include +Ranks to All Skills, useful affixes like Critical Strike Chance or Attack Speed, or generic offensive Legendary Aspects. The potential Quality Increases will be especially strong on a weapon, increasing its DPS. Other options can ruin your item, such as replacing a necessary existing affix.
Mercenaries
Once the Den is unlocked during the main questline in the Vessel of Hatred expansion, complete the key quests to acquire each Mercenary. Hire a Mercenary and enlist a Reinforcement in the following setup.
- Hired Mercenary: Raheir
- Skills:
 Ground Slam,
  Raheir’s Aegis,
  Bastion,
  Inspiration
- Skills:
- Reinforcement: Varyana
- Skill:
 Bloodthirst
 - Opportunity: Cast when the player casts any skill in combat.
- Skill:
Build Mechanics
The Flurry Rogue build is fairly simple to play.  Flurry becomes a powerful clearing skill, especially with
  Aspect of Encircling Blades to turn it into a circular Area of Effect around the player.
![]() Fundamental Puncture,
Fundamental Puncture, ![]() Enhanced Cold Imbuement, and
Enhanced Cold Imbuement, and ![]() Condemnation apply Vulnerable to enemies.
Condemnation apply Vulnerable to enemies.
![]() Poison Trap activates
Poison Trap activates ![]() Enhanced Poison Trap,
Enhanced Poison Trap, ![]() Subverting Poison Trap, and
Subverting Poison Trap, and ![]() Alchemical Advantage.
Alchemical Advantage.
Resource Management
![]() Enhanced Puncture,
Enhanced Puncture, ![]() Innervation, and
Innervation, and ![]() Combat should provide enough Energy generation if you are taking the time to build Combo Points before casting each
Combat should provide enough Energy generation if you are taking the time to build Combo Points before casting each ![]() Flurry.
Flurry. ![]() Ring of Starless Skies is an option for additional resource management.
Ring of Starless Skies is an option for additional resource management.
Once you obtain and equip ![]() Deathmask of Nirmitruq, Energy generation needs to be removed from the build. Life is spent instead and then recovered by
Deathmask of Nirmitruq, Energy generation needs to be removed from the build. Life is spent instead and then recovered by ![]() Improved Flurry and
Improved Flurry and ![]() Siphoning Strikes. Reallocate Skill Points from
Siphoning Strikes. Reallocate Skill Points from ![]() Innervation (3) to Siphoning Strikes (3). Switch
Innervation (3) to Siphoning Strikes (3). Switch ![]() Combat to
Combat to ![]() Turf in the Paragon setup.
Turf in the Paragon setup.
Rotation and Playstyle
Use the following rotation to optimize damage output.
- Activate
 Cold Imbuement for damage increases from
  Mixed Cold Imbuement and
  Frigid Finesse.
 - Against bosses and tough elites, cast
 Poison Trap and
  Caltrops to deal more damage.
 - Use a Potion to activate the damage buff from
 Unstable Elixirs.
 - Build 3 Combo Points with
 Puncture. If you have
  Condemnation equipped, only 1 cast of Puncture is necessary.
 - Cast
 Flurry to teleport to enemies and deal damage.
 - Continue to build Combo Points with
 Puncture before casting
  Flurry.
Momentum and Close Quarters Combat Variants
![]() Momentum is the default version for the Twisting Blades Rogue due to its numerous starting benefits, including a damage multiplier, Energy Generation, Damage Reduction, and Movement Speed. No additional scaling is needed for Momentum, making it the preferred Key Passive for a starter setup.
Momentum is the default version for the Twisting Blades Rogue due to its numerous starting benefits, including a damage multiplier, Energy Generation, Damage Reduction, and Movement Speed. No additional scaling is needed for Momentum, making it the preferred Key Passive for a starter setup.
![]() Close Quarters Combat can provide more damage output than
Close Quarters Combat can provide more damage output than ![]() Momentum if you have the proper gearing to scale its bonus. Keep stacking Damage to Close Enemies on gear until the damage bonus of Close Quarters Combat is worthwhile. Switch
Momentum if you have the proper gearing to scale its bonus. Keep stacking Damage to Close Enemies on gear until the damage bonus of Close Quarters Combat is worthwhile. Switch ![]() Fundamental Puncture to
Fundamental Puncture to ![]() Fundamental Heartseeker to activate the Marksman requirement of Close Quarters Combat.
Fundamental Heartseeker to activate the Marksman requirement of Close Quarters Combat.
Elixirs and Incenses
Visit the Alchemist in any main town to craft helpful Elixirs, or find Elixirs by killing enemies or opening chests during various activities in Diablo 4. Listed below are the best Elixirs to consume for the Flurry Rogue, ranked by importance.
 Elixir of Precision II provides the highest damage output increase, if not already capped at 100% Critical Strike Chance.
 Elixir of Advantage II increases damage output, if not already capped at 100% Attack Speed bonus from gear and Paragon.
 Elixir of Resourcefulness II greatly helps with Energy issues, if you do not already have the appropriate Energy gear. This elixir is highly recommended for starting characters to maintain the casting of Core Skills.
 Elixir of Fortitude II is the best general-purpose option for survivability.
Incense can also be crafted at the Alchemist. ![]() Queen’s Supreme (Core Stat),
Queen’s Supreme (Core Stat), ![]() Song of the Mountain (Defensive), and
Song of the Mountain (Defensive), and ![]() Soothing Spices (Resistance) are recommended. These Incenses are categorized into three separate groups and can be active simultaneously. The added Armor and Resistances are especially helpful to reduce incoming damage.
Soothing Spices (Resistance) are recommended. These Incenses are categorized into three separate groups and can be active simultaneously. The added Armor and Resistances are especially helpful to reduce incoming damage.
Season 11 Updates
A brief summary of the changes in Patch 2.5.0 that may pertain to this specific build is provided below. For a complete overview of Season 11, take a look at the comprehensive season guide.
- Damage scaling per 10 points of Dexterity increased from 1.1% to 1.25%.
 Improved Flurry: Healing reduced from 10% to 6%.
 Siphoning Strikes: Healing per Rank reduced from 1% to .5% of Maximum Health.
 Deathmask of Nirmitruq: Bonus damage increased from 70-100% to 70-130%.
 Tibault’s Will:
 - Maximum Life affix replaced with Critical Strike Chance affix.
- Damage Reduction while Unstoppable affix replaced with Attack Speed affix.
- Resource gain when becoming Unstoppable increased from 50 to 100.
Changelog
- December 7th, 2025: Guide updated for Season 11 (Patch 2.5.0).
- September 21st, 2025: Guide updated for Season 10 (Patch 2.4.0).
- June 27th, 2025: Guide updated for Season 9 (Patch 2.3.0).
- April 26th, 2025: Guide updated for Season 8 (Patch 2.2.0).
