This is a legacy build that is not competitive for the current version of Diablo 4 and which we do not recommend using. It only exists for documentation purposes and will not receive any further updates.
Updated for Season 7
Build Introduction
This theorycrafted Gorilla Thorns Spiritborn endgame build focuses on using the Jaguar’s ![]() Rake skill to scale Thorns’ damage while maintaining a high level of mobility during close combat. Since most of the damage is coming from Thorns, the build will require a few Uniques to work as intended.
Rake skill to scale Thorns’ damage while maintaining a high level of mobility during close combat. Since most of the damage is coming from Thorns, the build will require a few Uniques to work as intended.
This endgame guide assumes your Spiritborn is Level 60 and meets all the build requirements. If you are just starting out with a new Spiritborn character, we recommend heading over to the Quill Volley Leveling Build and then switching to this endgame build when ready.
For information on Season 7, you can check out our Season Hub.
Have questions or feedback about this guide? Join Ghazzy’s livestream and ask him!
Strengths and Weaknesses
- Great Mobility
- Good AoE and Single Target Damage
- Damage mainly comes from Thorns
To see how this build compares to the other builds on our site, you can check out our build tier lists.
Build Requirements
 Aspect of Plains Power
 Needleflare Aspect
Skill Bar and Skill Tree Points
Follow the points allocated in the Skill Tree above for the completed build. If you are missing skill points, complete Renown Tier 1-4 in every zone to get the missing additional points.
Spirit Hall Choice
The Spirit Hall allows you to combine two different Spirit Guardians or stick with just one.
- Primary Spirit Guardian: Gorilla
- Casting a Gorilla Skill deals 100% Thorns to enemies you hit and grants a Barrier for 10% of Maximum Life, up to 40%, for 3 seconds. All Skills are now also Gorilla Skills.
- Secondary Spirit Guardian: Gorilla
- Maximum Resolve increased by 2. When you have at least 5 stacks of Resolve, you are Unstoppable.
For this endgame build, we choose the Gorilla as both the primary and secondary Spirit Guardian. Using the Jaguar’s ![]() Rake, with the Gorilla as a primary spirit guardian, we will significantly scale Thorns’ damage, allowing us to deal huge damage to enemies or bosses.
Rake, with the Gorilla as a primary spirit guardian, we will significantly scale Thorns’ damage, allowing us to deal huge damage to enemies or bosses.
The passive of having the Gorilla as a secondary guardian, when combined with the ![]() Armored Hide skill, will drastically improve our Resolve stacks generation, make us Unstoppable, and increase our damage even further.
Armored Hide skill, will drastically improve our Resolve stacks generation, make us Unstoppable, and increase our damage even further.
Gear, Stats, Gems, Runes, and Elixirs
The following sections cover all systems that are important if you want to improve the power of your character in the endgame of Diablo 4.
Legendary Aspects
Each Aspect is listed with its matching gear slot. Do your best to keep each Aspect in the assigned slot. Remember to salvage Legendary Items with higher Aspect values to unlock them in the Codex of Power, and then imprint them onto gear pieces with the preferred affixes.
Additionally, if you are trying to farm a specific item, we recommend using your Obols to target farm them!
| Gear Slot | Gems/Runes | Aspect / Unique | Legendary Aspect / Unique Power |
|---|---|---|---|
| Helm | While your spirit hall choices match: their bonuses are 100% more potent. Skills of their Base Spirit gain x% Vigor Cost Reduction. Skills of their Base Spirit gain x% COoldown reduction. | ||
| Chest | Thorns have a 10% chance to deal {x}% increased damage. | ||
| Gloves |  Aspect of Turbulence Aspect of Turbulence | ||
| Pants |  Assimilation Aspect Assimilation Aspect | You have 8% increased Dodge chance. When you dodge, Fortify for {x}% of your maximum life. | |
| Boots | |||
| Amulets(50% bonus) |  Bristleback Aspect Bristleback Aspect | When you dodge or block an attack you trigger x% Thorns attacks against the attacker. | |
| Ring |  Needleflare Aspect Needleflare Aspect | Thorns damage dealt has a x% chance to deal damage to all enemies around you and your minions. | |
| Ring |  Aspect of Wild Claws Aspect of Wild Claws | Rake manifests a spirit Jaguar which also casts Rake at a random enemy, dealing x% Base damage. | |
| Weapon (200% bonus) |  Aspect of Plains Power Aspect of Plains Power | Lucky Hit: up to a 25% chance to create a Mystic Circle for 10 seconds. Casting a Jaguar skill in Mystic Circles empowers them to keep your Ferocity at Maximum and increase your damage by x% per stack while you remain within. |
The new Spiritborn ![]() Scorn of the Earth Unique boots, together with the
Scorn of the Earth Unique boots, together with the  Aspect of Turbulence, make for an incredibly powerful combination, turning your Evade into
 ![]() Soar, and automatically casting
Soar, and automatically casting ![]() Vortex. This allows us to use other skills instead, as the normal Evade (space bar) skill will now cast both spells simultaneously.
Vortex. This allows us to use other skills instead, as the normal Evade (space bar) skill will now cast both spells simultaneously.
Stat Priority and Tempering Affixes
Affixes on the same line are considered to be equally important. To masterwork, you will need rare materials that only drop from Nightmare Dungeons. Be sure to check our Tempering and Masterworking guides, for more details about these topics.
| Slot | Targeted Gear Affixes | Tempering Affixes |
|---|---|---|
| Helm | 1. Armor 2. Dexterity 3. Ranks to Razor Wings | |
| Chest | 1. Ranks to Armored Hide 2. Thorns 3. Armor/Resistance | |
| Gloves | 1. Maximum Life 2. Attack Speed 3. Dexterity | |
| Pants | 1. Armor 2. Maximum Life 3. Dexterity | |
| Boots | 1. Movement Speed 2. Ranks to Rushing Claw 3. Ranks to Focus Skills | |
| Amulet | 1. Ranks to Apex 2. Total Armor 3. %Dexterity | |
| Rings | 1. Attack Speed 2. Maximum Life 3. Resistance to All Elements / Lucky Hit: Change to Make Enemies Vulnerable | |
| Weapon | 1. Maximum Life 2. Dexterity 3. Vulnerable Damage |
The priority order of Resistances is Lightning > Poison > Fire > Cold > Shadow.
Generally, Armor is capped at 1,000. However, as this build scales with armor, it is recommended to try and get as much as you can.
Gems and Runewords
Listed below are the recommended Gems and Runewords to socket into your gear.
Gems
| Weapon Gems | Armor Gems | Jewelry Gems |
|---|---|---|
for increased Critical Strike Damage. | For more Dexterity. |
Occult Gems
For your Jewelry sockets, you can also equip Occult Gems in Season 7. Here are some recommended Occult Gems for this build:
 Cornucopia: While you have three or more Growth and Decay Witch Powers slotted, you generate 30% more Barrier, gain 30% more Fortify and have 30% more Thorns.
 Dust Stone: For each of your Auras and Hexes an enemy is afflicted by, they take 2.5% increased damage from you.
 Hungering Void: While you have an Aura active, pull Nearby enemies toward you every 8 seconds.
Runewords
Runewords, unlocked during the Vessel of Hatred campaign, replace gems in gear and can improve your build by combining a trigger Rune of Ritual and an effect Rune of Invocation. Ritual Runes generate Offerings, which Invocation Runes consume to trigger effects, with some even gaining overflow bonus power from excess Offerings. You can equip up to two Runeword pairs (four Runes) at a time. For a detailed guide on Runewords, check out our Runewords Guide!
The following are recommended Runeword combination options for the Gorilla Thorns endgame build of the Spiritborn:
| Runeword Combination | Runeword Effects |
|---|---|
| Xol Ohm | |
| Feo Yom | |
| Bac Eom |
Which Elixirs Should You Use?
Visit the Alchemist and craft an Elixir providing any Resistance you need most, or the Assault Elixir to increase Attack Speed.
Some Elixirs cannot be crafted and only drop from activities like Helltides or Nightmare Dungeons. Additionally, make sure to keep your health potion upgraded!
 Elixir of Precision provides the highest damage output increase.
 Elixir of Advantage increases your attack speed
 Elixir of Fortitude for additional survivability
Paragon Board
Paragon unlocks after reaching Level 60, and is considered an endgame progression system. Leveling up your paragon greatly increases your character’s power! We recommend using the following Legendary nodes and Glyphs to improve the build even further as you grind through the endgame. Note that each Glyph’s information and radius listed below is for the Level 46 version.
Witchcraft Powers
During Season 7, you can equip and rank up 6 Witchcraft Powers as you progress. These powers can be acquired at the Coven’s Altars near the Tree of Whispers. To purchase them, you will need Restless Rot, a currency earned naturally through doing Headhunts.
These Witchcraft Powers provide unique ways to strengthen your build. As you progress through the above leveling journey, consider prioritizing the following powers:
| Witchcraft Power & Type | Effect |
|---|---|
| When an enemy is afflicted by both Hex and an Aura Effect, a Piranhado is summoned, pulling enemies towards it and dealing x physical damage over 12 seconds. May occur once every 20 seconds. At Rank 5 and above: Piranhado moves itself towards nearby enemies. | |
| Feed upon the life force of nearby enemies whenever you use a skill with a cooldown, increasing your primary stat by 3% per monster for x seconds. At Rank 9 and above: Soul Harvest does not lose duration so long as enemies are nearby. | |
| Enemies near you have a x% chance for their attacks to be interrupted. Does not work on bosses. At Rank 5 and above: Auro of Misfortune increases your Movement Speed by 5% and Slows enemies by 30%. | |
| Damage done by your Witchcraft Effects afflicts enemies with Hex of Shattering causing them to deal x% reduced damage for 5 seconds. At Rank 8 and above: When a Hex effect is applied to Headrotten, all damage will be guaranteed critical strikes for 5 seconds. | |
| Release a Wave of Woe when damaging an enemy with your skills. Wave of Woe deals an additional x Shadow damage and echoes this damage to all other nearby enemies of the same type. At Rank 5 and above: Damage is increased by 15% each time damage is echoed and is guaranteed to echo at least 5 times. May strike the same target multiple times. | |
| Lucky Hit: You have up to a x% chance to apply Hex of Flames. Hex of Flames deals 40% additional Fire damage each time you deal damage to the target. At Rank 7 and above: Hex of Flames explodes dealing damage to all nearby enemies when you land a critical strike. |
Mercenaries
During the Vessel of Hatred campaign, you will unlock different NPC Mercenaries who join you on your travels. In the early endgame, you can generally pick any mercenary you like, as they will not play an essential role until you optimize your build in the endgame. However, if you would prefer to get a recommendation, we would advise selecting Subo as your main companion, and Raheir as Reinforcement.
Subo Skill Tree choices:
- Core Skill:
 Wire Trap
 - Core Passive:
 Ready At Hand
 - Iconic Skill:
 Trip Mines
 - Iconic Passive:
 Mastermind
Raheir Reinforcement choices:
- Opportunity Skill: Pick “Injured” as opportunity skill (will automatically trigger when you become Injured)
- Reinforcement Skill:
 Provoke
Rotation and Playstyle
Similar to other endgame builds we have for the Spiritborn, this one is mechanically straight-forward and should be easy to play, making it the perfect build to grind endgame.
The main source of damage in this build comes from Thorns, boosted by various effects. ![]() Toxic Skin poisons enemies, increasing Thorns damage to them. Dodging or blocking triggers additional Thorns damage through our Amulet (
Toxic Skin poisons enemies, increasing Thorns damage to them. Dodging or blocking triggers additional Thorns damage through our Amulet ( Bristleback Aspect), and
  Needleflare Aspect makes this AoE-damage, hitting multiple enemies. The
  Assimilation Aspect further increases dodge chance, which in turn leads to even more Thorns triggers.
![]() Rake is going to be the skill we actively use the most, as it helps with Vigor generation due to the interaction between
Rake is going to be the skill we actively use the most, as it helps with Vigor generation due to the interaction between ![]() Vigorous and the
Vigorous and the  Aspect of Wild Claws, allowing it to hit multiple targets. The
  Aspect of Plains Power is used for boss fights or tough elite enemies, while the unique
 ![]() Loyalty’s Mantle helmet boosts all our skills and reduces Vigor cost as well as cooldowns, because they are tagged as Gorilla skills due to our primary Guardian choice.
Loyalty’s Mantle helmet boosts all our skills and reduces Vigor cost as well as cooldowns, because they are tagged as Gorilla skills due to our primary Guardian choice.
Thanks to the ![]() Scorn of the Earth boots and the
Scorn of the Earth boots and the  Aspect of Turbulence, we can jump straight into the fight with a free cast of
 ![]() Soar and
Soar and ![]() Vortex simply by using our Evade skill. After engaging in combat,
Vortex simply by using our Evade skill. After engaging in combat, ![]() Armored Hide will provide good protection, followed by
Armored Hide will provide good protection, followed by ![]() Rushing Claw for additional damage and mobility boost:
Rushing Claw for additional damage and mobility boost:
- Evade into the group of enemies to automatically trigger
 Soar and
  Vortex for free.
  Armored Hide for survivability.
 Counterattack to increase dodge change.
 Rushing Claw for additional damage. Rushing Claw can allow you to dash between mobs.
  Toxic Skin to poison enemies and increase the Thorns damage done to them.
- Spam
 Rake to gain stacks of Ferocity and deal AoE damage!
Uniques and Mythic Uniques
Below you will find information on Uniques and Mythic Uniques that are useful and recommended for this build. Moreover, if you are interested in target farming Mythic Uniques, check out our How to Farm Mythic Uniques guide.
If a Unique or Mythic Unique is not listed here, it is NOT recommended and won’t benefit this specific build in any way.
Uniques
Listed below are the recommended and optional Unique Items for this build.
 Scorn of the Earth (Required): Turns Evade into Soar, providing a free Soar cast every time you Evade.
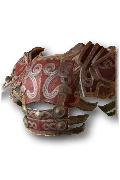 Razorplate (Required): Increased Thorns Damage. Additionally, Thorns has a 10% chance to deal 100-200% increased damage on top.
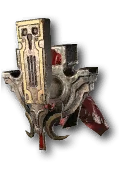 Harmony of Ebewaka (Highly Recommended): Your Skills are all additionally Jaguar, Eagle, Gorilla, or Centipede Skills based on your secondary Spirit Hall choice. Each Spirit type on a Skill increases its damage by 50%[x].
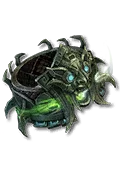 Wound Drinker (Highly Recommended): Generates additional Vigor each time you deal Thorns damage. Gain
  Toxic Skin‘s Passive Effect.
This Gorilla Spiritborn build does not require any Mythic Uniques!
If you want to have a look at builds that focus on other items or spirit guardians, you can find all our Spiritborn builds listed on this page.
Season 7: Witchcraft
For a complete overview of Season 7, its mechanics and theme, new leveling activity, and other changes coming with the Season of Witchcraft, please take a look at our comprehensive season hub here.
Additionally, the Season of Witchcraft is the first season bringing changes to Spiritborn. Here are the changes related to this build.
 Endurance: Vigor generated increased from 5/10/15 to 10/20/30.
 Bastion: Thorns increased from 40/80/120 to 120/240/360.
 The Hunter: Rank 5: The Hunter’s initial damage will Execute Injured Non-Boss enemies.
 Spiritborn Resolve – Defensive Recipe: Maximum Resolve Stacks replaced with Armor +X%.
 Bristleback Aspect: Thorns damage increased from 100-160% to 100-200%.
 Scorn of the Earth:
 - Effects that reduce Evade’s cooldown now affect Soar’s Evade Override.
- Soar Deals Damage Based on Distance Traveled increased from 203-275% to 308-425%.
- Soar Grants Maximum Life as Barrier replaced with Lightning Resistance.
- Bonus Soar damage increased from 10-50%[X] to 50-100%[X].
 Xol: Updated tooltips on runes that Invoke players skills to be more clear with the Xol rune effect.
 Yom: Overflow: Increase Stun Duration.
Obol Gambling
Obol gambling is a great way to potentially find item upgrades or items missing from your build. Similar to Kadala in Diablo 3, you can use Obol vendors in town to try and get any specific item that you are missing. When a Level 100 Character spends Obols, all gear from that vendor will be 925 item power, the highest in the game, allowing you to fill out gear with the affixes or Legendary Aspects you need.
You can check out our Obol Gambling Tool Guide here!
Changelog
- January 18th, 2025: Updated Tempers and added Witchcraft Powers and Occult Gems for Season 7.
- December 26th, 2024: Fixed Rotation and mechanics.
- October 14th, 2024: Added
 Headhunter Glyph on 1st Paragon board (was missing).
 - October 2nd, 2024: Guide created and theorycrafted for Vessel of Hatred, Season 6.
