Build Introduction
The point of this leveling guide is to quickly take your character from 1 to 60 while using Zeal and Zenith and prepare for your transition into the endgame. This guide will walk you through the skill point placement for levels 1-60 and give some insight on how each passive and skill work together to create the synergies needed to be able to tackle whatever form of leveling you choose to take. We will also give some insight on Legendary Aspects, Affixes, Gems, and Elixirs we can utilize to accelerate our journey.
Our primary skill with this build is Advance as our primary Faith Generator. We’ll be augmenting this skill using:
 Enhanced Advance – This grants us Unhindered for 2 seconds allowing us to keep moving through enemies and out of any dangerous puddles on the ground.
 Wave Dash – This causes Advance to become tagged as a Juggernaut Skill but most importantly, it causes Advanced to generate 1 Resolve stack for every 1 meter you dash.
Our Core Skill and primary method of dealing damage is Zeal. Our spender and what we’ll be using to chop up the forces of hell. We augment this skill with:
 Enhanced Zeal – This causes Zeal to gain two additional strikes granting it even more damage.
 Zealot’s Legacy – An incredible node that causes Zeal to extend its assault and seek surrounding enemies as well as striking 4 additional times giving us great clearing potential for a skill that would otherwise be more single target oriented.
Now that we know the two most basic skills, we can look deeper into how we will allocate our skill points as we level up.
Quick Navigation
Allocation of Skill Points
Below is the recommended order for spending your points as you level up. If you are missing skill points, complete the Season Ranks to earn the additional points as you progress your journey.
Skill Bar and Skill Tree Points
If you are unsure how best to use these skills read our Build Mechanics section after setting up your skill bar.
Wondering what comes after level 60 or which Paragon Boards to choose? Head to the Paladin Builds Page and choose an endgame build to continue progressing your character beyond level 60 and into the endgame.
Paladin Class Mechanic – Oaths
Paladins are able to devote themselves to one of four Oaths which drastically change your game play and give you access to some new resources that allow you to take your build even further. Each Paladin archetype is represented in the Oath system allowing players to choose between Zealot, Juggernaut, Judicator, or Disciple. For this build we will want to take the Zealot Oath.
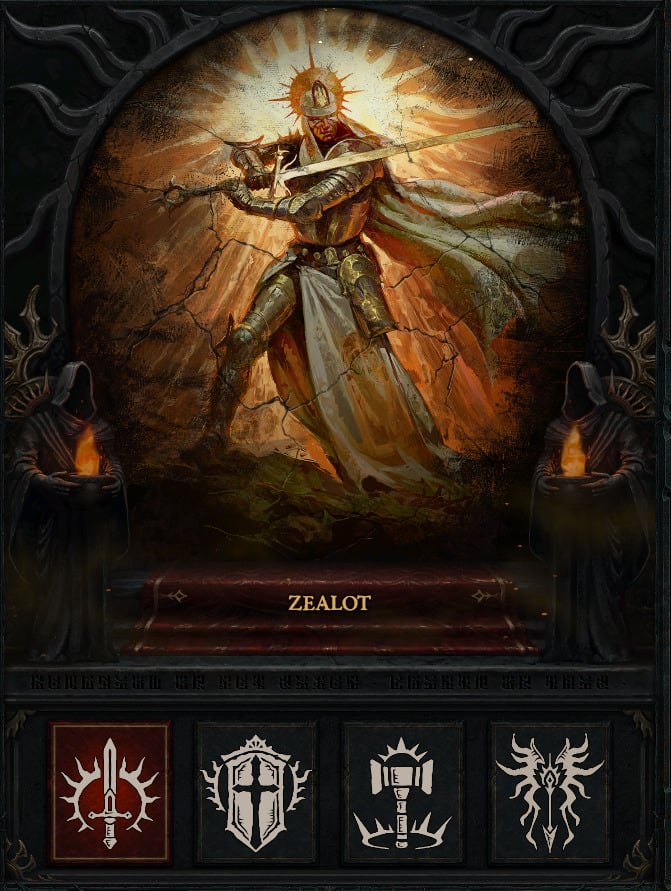
Under this Oath whenever we attack with Zealotry Core or Ultimate Skills we gain a stack of Fervor for 2 seconds. Critical Strikes cause those skills to hit an additional time per stack of Fervor for some extra damage. Basic Skills refresh these stacks. Lastly, if you would gain Fervor while at max fervor, you instead gain some Fortify for 1% of your maximum life. This Oath allows this build to continue dishing out the damage slashing quickly between groups of demons with Zeal and Zenith carving a path through Sanctuary.

Gear, Stats, Gems, and Runes
When selecting your items, higher item power generally indicates stronger gear, but you also need to consider the affixes and effects that are relevant to your class and your build. When making gear decisions during leveling, keep an eye out for both the item power and specific attributes that complement that build.
Legendary Aspects
For general information on how to unlock the Codex of power, head to our Aspects and Codex of Power Guide. You can also imprint aspects onto items by visiting The Occultist in towns.
Listed below are all the aspects that are important to this build as well as what slot they are best placed in. However, you can move the slots around during the leveling process especially since early on some of these aspects can only be found via random drops and might not be on the most ideal slot.
| Gear Slot | Legendary Aspect | Aspect Power |
| Helm |  Aspect of Glynn’s Anvil Aspect of Glynn’s Anvil | Your maximum Resolve is increased by 2. Resolve increases your Damage Reduction by an additional +[1-5]% |
| Chest |  Aspect of Might Aspect of Might | Basic Skills grant 20% Damage Reduction for [2-10] seconds. |
| Gloves |  Aspect of Jacques’ Fervor Aspect of Jacques’ Fervor | Each stack of Fervor grants you x[15-20%] bonus Critical Strike Damage |
| Pants |  Aspect of Valiance Aspect of Valiance | Valor Skills generate [1-6] Resolve when cast. |
| Boots |  Aspect of Unstoppable Force Aspect of Unstoppable Force | Gain [5-20%] Movement Speed. Double this bonus while Unhindered or Unstoppable. |
| Amulet |  Revelator’s Aspect Revelator’s Aspect | Zealot Skills deal x[12.5-32.5%] increased damage. Doubled while at 3 or more stacks of Fervor. |
| Ring 1 |  Virtuous Aspect Virtuous Aspect | Using a Valor Skill increases your damage by x[40-60%] for 7 seconds. |
| Ring 2 |  Aspect of Utmost Glory Aspect of Utmost Glory | While Healthy, your skills deal x[20-35%] increased damage. Double this bonus against Weakened enemies. |
| Weapon (1-Handed or 2-Handed) |  Aspect of the Zealot’s Covenant Aspect of the Zealot’s Covenant | Additional hits from Zealot Oath deal x[100-120%] increased damage. Your Maximum Fervor is increased by 1 and its duration is increased by 2 seconds. |
| Shield (If using 1-Handed) |  Squire’s Aspect Squire’s Aspect | Basic Skills increase the Critical Strike Chance of your Core Skills by x[10-20%] for 5 seconds, up to 3 times. |
Stat Priority and Tempering Affixes
During your leveling journey, you may stumble across items with incredible affixes. Tempering these items can provide you with a significant boost in power, so make sure you understand how tempering works!
As a reminder, tempering is only possible if you’ve found the tempering manuals while leveling.
Keep an eye out for the following stats that are beneficial for this build. We will list the most ideal stats and best tempering affix if you’re lucky enough to find the right manual.
| Gear Slot | Targeted Affixes | Tempering Affix |
| Helm | 1. Cooldown Reduction 2. Strength 3. Maximum Life 4. Resistance to All Elements | Maximum Life |
| Chest | 1. Strength 2. Maximum Life 3. Armor 4. Resistance to All Elements | Maximum Life |
| Gloves | 1. Attack Speed 2. Cooldown Reduction 3. Critical Strike Chance 4. +Ranks to Core Skills | Zeal Size |
| Pants | 1. Strength 2. Maximum Life 3. Armor 4. Resistance to All Elements | Maximum Life |
| Boots | 1. Movement Speed 2. Strength 3. Resistance to All Elements 4. Armor | Movement Speed |
| Amulet | 1. %Strength 2. Cooldown Reduction 3. Attack Speed 4. Movement Speed | Zenith Cooldown Reduction |
| Ring 1 | 1. Strength 2. Attack Speed 3. Critical Strike Chance 4. Critical Strike Damage | Zenith Cooldown Reduction |
| Ring 2 | 1. Strength 2. Attack Speed 3. Critical Strike Chance 4. Lucky Hit: Chance to enemies vulnerable for 2 seconds | Zenith Cooldown Reduction |
| Weapon (1-Handed or 2-Handed) | 1. Strength 2. Maximum Life 3. Critical Strike Damage 4. Damage% | Chance for Zeal to deal Double Damage |
| Shield (If using 1-Handed Weapons) | 1. Strength 2. Cooldown Reduction 3. Armor 4. Resistance to All Elements | Chance for Zeal to deal Double Damage |
Gems and Runewords
Gems
Listed below are the best gems to socket into gear for each slot type.
- Weapons:
 Emerald for critical strike damage
 - Armor:
 Ruby for more Strength
 - Jewelry:
 Diamond for resistance to all elements
Runes
While leveling in Diablo 4, you may come across Runes, a unique gem that can be placed into an item with two sockets such as a helm, chest, pants, or two-handed weapon. Putting one Ritual Rune and one Invocation Rune into the same item creates a Runeword, which can enhance your gameplay and grant powerful boons. Ritual Runes generate Offering when the conditions are met, and once enough Offering has been met, the associated Invocation Rune’s effect will trigger. Here are some early rune suggestions for leveling if you’re fortunate enough to find them.
| Rune Name | Rune Effect |
| Gain 300 Offering: Cast 5 Skills then become exhausted for 3 seconds. | |
| Requires 5 Offering (Overflow: Increased resource generation): Restore 3.5% Primary Resource | |
| Gain 100 Offering: Cast 2 Mobility or Macabre Skills | |
| Requires 25 Offering (Overflow: gain multiple stacks): Gain 2.5% Critical Strike Chance for 5 seconds, up to 25% |
Season 11 Mechanics
Divine Gifts
As you complete the season journey and fight across Sanctuary you will earn the ire of the lesser evils. Defeating them will grant you corrupted essences which you can then purify into Divine Gifts. There are 8 of these in total and you will have four Purified and four Corrupted allowing you to modify various content and get different boons and reward as a result. For this build our recommended setup is below:
Purified
- Essence of Lies (Fortify)
- Essence of Squalor (Experience Globes)
- Essence of Anguish (Movement Speed)
- Essence of Sin (Armor)
Corrupted
- Essence of Pain
- Essence of Shadows
- Essence of Screams
- Essence of Hellfire
Sanctification
Season 11 brings a new way to “Finish” an item called Sanctification. Any item of item power 750 or higher can be Sanctified, but BE WARNED: Sanctification will make it so that you cannot alter the item any further so it should always be the final step in the crafting process! It provides many powerful options to enhance your builds. Since it requires item power 750 or higher, we won’t be including a list of options in this leveling guide. Check out our Endgame Builds for more information.
Mercenaries
As you play through the campaign in Vessel of Hatred, you will unlock various NPC Mercenaries who can join you on your quest to slay demons. Each Mercenary has their own small talent tree that will give them bonuses and skills to help you. Additionally, you can assign a Mercenary that you don’t take with you as a reinforcement to jump in when you activate certain skills. Let’s take a look at how we want to set this up for this build
We hire Raheir, the Shieldbearer
- Core Skill:
 Ground Slam
 - Core Skill Passive:
 Raheir’s Aegis
 - Iconic Skill:
 Bastion
 - Iconic Skill Passive:
 Inspiration
Our Reinforcement Mercenary will be Varyana, the Berserker Crone
- Opportunity Skill: Skill Cast
- Reinforcement Skill:
 Bloodthirst
Build Mechanics
Rotation and Playstyle
The playstyle of this build is fair straight forward. We want to attack fast and maintain Fervor and Resolve and use Zeal to chop everything around us. Here’s a quick rundown of our skills:
 Advance – Our basic skill, use this to generate faith and use its movement to dash in to packs and gain Resolve.
 Zeal – The bread and butter of our build. Press this as often as possible to slice through hordes.
 Fanaticism Aura – A passive damage buff giving us attack speed and crit chance. It can pressed to apply Weakened to enemies nearby reducing the damage they deal. Use when you’re in a tight spot.
 Defiance Aura – A passive life regeneration buff that also grants Resolve Stacks. An extremely great Aura that can be useful to help with Rally spam.
 Rally – A supportive buff that restores Faith and grants movement speed. Spam this constantly to move between mobs as it stacks and we have lots of ways to regain health.
 Zenith – Our ultimate skill. It performs a massive two hit combo and lunges it to our targets. It can easily take out large groups or solo elites. It is possible to chain this if you kill enough enemies and if you can cast it again using its built-in cooldown reset, you should!
Fervor
Fervor is a resource gained through the Zealot Oath as well as some Legendary Aspects. This provides an attack speed boost and some skills gain even more benefits while you have stacks of Fervor. Basic Skills always refresh the stacks of Fervor you have and if you chose the Zealot Oath, hitting with a Zealotry skill do the same. We want as much uptime on Fervor as we can get.
Resolve
Resolve is a damage reducing effect. While we have any stacks of Resolve, we gain 20% damage reduction. Getting hit by an enemy removes one stack of Resolve no matter how big the hit was. You can hold a certain number of Resolve stacks, the default is 9 stacks but this can be increased through some Legendary Aspects, Unique Items, and Tempering.
Which Elixirs Should You Use?
Visit the Alchemist in any main town to craft helpful Elixirs that increase stats, and experience gain for 30 minutes. Make sure to forage plants and pick up the necessary crafting materials during your adventures; they randomly spawn around the world. We want to use ![]() Elixir of Advantage for the attack speed but any Elixir you have should be used for the extra experience as they all grant between 5 and 8% increased experience to help you fly to level 60 even faster.
Elixir of Advantage for the attack speed but any Elixir you have should be used for the extra experience as they all grant between 5 and 8% increased experience to help you fly to level 60 even faster.
Season 11 Updates
For a complete overview of Season 11, its mechanics and theme, new leveling activities, and other changes coming with the Season of Divine Intervention, please check out our Season Hub!
Season 11 is the introduction of the Paladin Class! So there are no class updates to post yet.
Difficulty & Endgame
Once you hit level 60 with this build, you will be ready to tackle harder difficulties as you transition into more challenging content. Make sure to pick one of our recommended Endgame Builds to continue the journey. Additionally, we recommend keeping your Obols until your reach level 60 then spend them on a weapon to help kickstart your preferred endgame setup!
- January 10th 2026: Updated aspect recommendations and skill tree pathing.
- December 13th 2025: Fixed guide and navigation links.
- December 12th 2025: Clarified rotation. Updated Guide for Defiance and Rally
- December 12th 2025: Guide created for Season 11.
