

Build Introduction
This Warlock leveling build is potentially the fastest amongst the viable options. It’s also incredibly easy to play once you’ve unlocked  Rampage to full send your insane damage output!
Recommended World Tier to start in: Hard
Quantity over quality is the road to success in leveling. Stay at a difficulty level where Elites and Seasonal content pose little threat and can be killed quickly – this nets the most experience. Move up through World Tiers only when you no longer struggle in Helltides and Seasonal content in the next tier.
Soul Shards is the Warlock’s unique class mechanic allowing you to bind yourself to a Soul Shard Greater Demon that will fight beside you. They come with a variety of different effects, as well as on-use abilities to help you on the battlefield. Below you’ll find the recommended Soul Shard Demon to bind for this build.
- Mastermind Shard – Grants
 Summon Laalish Skill. Recast Skills no longer break Shadowform Stealth at the cost of two stacks of Shadowform per Cast. While you have Shadowform, Abyss Skills deal x30% increased damage, and you gain +5% increased Movement Speed per stack.
 - Unfathomable Fragment – Laalish also weakens enemies. Laalish deals x100% increased damage and Executes enemies. When Laalish kills an enemy or when an enemy is Executed, the Cooldown of Command Laalish is reduced by 0.2 seconds.
Check the Leveling Guide Overview for a comparison of Warlock starter builds on Icy Veins.
Have questions or feedback on the guide? Join the livestream and ask GhazzyTV or come to Cashlarond’s stream!
Video Guide
Skill Tree Points
To prepare for what happens after level 70, head over to our Warlock Builds page to choose your weapon! If you don’t yet meet the requirements, follow this post-70 progression strategy to push up to Torment II/III while farming gear for your endgame build of choice.
Gear, Stats, Gems and Runes
Always prioritize the highest base damage possible when upgrading your weapon. Attack Speed and Movement Speed are highly valued for this builds progression.
Make sure you keep an eye out for the Legendary Aspects to research through salvaging. An Amulet is recommended for early imprinting important Aspects, since it provides a +50% bonus effect and is replaced less often than weapons. Check out our dedicated in-depth Aspect and Codex of Power guide for more information.
For this build particularly, we’re mostly looking for  Hellbent Commander Aspect or the best offensive scaling.
Imprinting aspects costs  Veiled Crystal, which are easily acquired in Helltides or from salvaging Rare gear and above. Prioritize salvaging gear for materials and aspects over selling it during leveling.
The table below lists the Legendary Aspects you should be looking for:
| Aspect Name | Legendary Aspect Power | Source |
 Aspect of Might Aspect of Might | Basic Skills grant [20 – 30%] Damage Reduction for 4 seconds. | Random Drop |
| Demonic Aspect | Each hit with Demonology skills increases Demonlogy damage output. | Random Drop |
| Hellbent Commander Aspect | Increases the damage dealt by your summons. | Random Drop |
| Blood Boiling Aspect | When your Core Skills Overpower an enemy, you spawn 3 Volatile Blood Drops. Collecting a Volatile Blood Drop causes it to explode, dealing [X] Physical damage around you. Every 20 seconds, your next Skill is guaranteed to Overpower. | Random Drop |
Priority order for Offensive Legendary Aspects on your 2-handed weapon (200% effect) and amulet (150% effect) is listed below:
A general rule of thumb would be to put any sort of movement speed increasing aspect on your amulet to further enhance your progression speed.
Stats Priority and Tempering Affixes
Keep in mind that Tempering Affixes are unlocked by Tempering Manuals you find as you progress. Be sure to check our Tempering guide for more details about this topic.
One of the regular affixes on a gear piece can be re-rolled repeatedly until the desired outcome. This is covered in our Occultist guide for more details.
There are not many modifiers worth bothering with during the leveling stage, but for this particular build, always apply whenever possible:
 Worldly Endurance – Maximum Life
- Worldly Destruction – Increased Attack Speed temper on your weapons
- Natural Motion – Movement Speed
Generally, you will be looking for the following stats in descending order of priority:
| Slot | Gear Affixes | Tempering Affixes |
| 2H Weapon (Sword) | 1. Weapon Damage 2. Willpower 3. x% Physical Damage Multiplier 4. x% All Damage Multiplier 5. Maximum Life | Worldly Destruction – Attack Speed |
| Helm | 1. Maximum Life 2. Armor 3. Willpower | Worldly Endurance – Maximum Life |
| Chest | 1. Maximum Life 2. Armor 3. Willpower | Worldly Endurance – Maximum Life |
| Gloves | 1. Attack Speed 2. x% Vulnerable Damage Multiplier 3. x% All Damage Multiplier 4. Willpower | Demonologist – Demonology Damage |
| Pants | 1. Maximum Life 2. Armor 3. Willpower | Worldly Endurance – Maximum Life |
| Boots | 1. Movement Speed 2. Willpower 3. Maximum Life | Natural Motion – Movement Speed |
| Amulet | 1. Movement Speed 2. Attack Speed 3. Willpower | Natural Motion – Movement Speed |
| Rings | 1. Attack Speed 2. x% Vulnerable Damage Multiplier 3. x% All Damage Multiplier 4. Any resistances | Worldly Stability – Resource Generation |
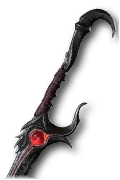 Anathema of the Primes – This is by far the best unique in the game for the build as it makes all your Archfiend Demon skills cost Wrath instead of Dominance.
Gems and Runewords
Generally, we don’t recommend socketing items until level 45+ due to material cost and the fact that you’ll be replacing your gear too frequently, especially weapons.
| Weapon | Armor | Jewelry |
 Amethyst for increased Shadow damage. Amethyst for increased Shadow damage. |  Runewords, Runewords,  Splinter Splinteror  Sapphire for increased Willpower. Sapphire for increased Willpower. | Splinter or  Diamond for All Resistances Diamond for All Resistances |
When it comes to Runewords, the most beneficial combinations are:
| Runeword | Priority | Comments |
 Nagu + Nagu +  Que Que | Very High | Lets you automatically cast  Earthen Bulwark for barrier generation. Earthen Bulwark for barrier generation. |
Nagu +  Jah Jah | High | Replaces your evade skill with a teleport ability instead. |
You get runes back for free when salvaging items or the Jeweler can extract them for you.
| Soul Splinter | Slot preference | Effect |
 Abyssal Splinter of Pain Abyssal Splinter of Pain | Avoid | You gain 25% Damage Reduction, but you lose 30% Movement Speed. |
 Abyssal Splinter of the Black Soulstone Abyssal Splinter of the Black Soulstone | Jewelry | Killing enemies absorbs a soul for 15 seconds. Each soul increases your damage by x2.5% but increases your damage taken by 0.5%. This effect stacks, but does not refresh. |
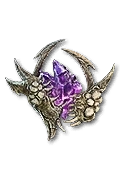 Abyssal Splinter of Hellfire Abyssal Splinter of Hellfire | 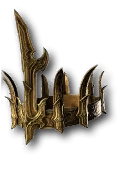 Leoric’s Crown or worse prioritized Jewelry Leoric’s Crown or worse prioritized Jewelry | You deal x50% increased damage, but lose 100% Critical Strike Chance. |
 Abyssal Splinter of the Mother Abyssal Splinter of the Mother | Avoid | You are Unhindered. Touching enemies makes them Vulnerable for 10 seconds. After touching 250 enemies, you are Stunned for 4 seconds. |
| Abyssal Splinter of Anguish | Jewelry | You gain +35% Attack Speed and Critical Strike Chance, but your Primary Resource Costs are increased by 30%. |
 Abyssal Splinter of Lies Abyssal Splinter of Lies | Leoric’s Crown or worse prioritized Jewelry | You gain 100% increased Gold Drop Rate, Crafting Material Drop Rate, and 25% Bonus Experience, but you are always Weakened and Vulnerable. |
 Abyssal Splinter of Sin Abyssal Splinter of Sin | Avoid | You gain x50% Maximum Life, but your Maximum Primary Resource is reduced by 30%. |
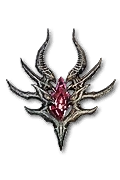 Abyssal Splinter of Damnation Abyssal Splinter of Damnation | Optional | Killing an Elite Pack increases Monster Power by 1 for 25 Seconds |
Seasonal Mechanics
Splinters of Evil
In Season of Hell’s Legacy, one of seasonal powers will consist of the three 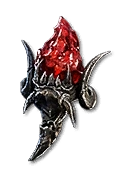 Splinters of Prime Evil, acquired by completing seasonal questline and defeating echoes of Diablo beneath Tristram Cathedral, Baal at Arreat Summit, and Mephisto within the Durance of Hate. Splinter of Evil trigger iconic Prime Evil area of effect damage abilities and alter actitivies associated with the Prime Evil.
Main consideration for first Splinter of Evil choice is expected to be in activity modifiers. Only one Splinter of Prime Evil can be used at a time, but there is a mechanism to change. Due to Helltide being the most common early progression activity, it is recommended to use Splinter of Terror first.
Duplicitous Soul Splinters
The second layer of seasonal powers consists of Duplicitous Soul Splinters gems, like Abyssal Splinter of Hellfire, to be slotted into jewelry and the newly introduced Leoric’s Crown helm. You can equip up to three Soul Splinters among available Jewelry slots.
Duplicitous Soul Splinters gems provide sizeable buffs to some stats at the price of heavy penalties to others. One should be careful at making choices to either ignore the penalty – Damage over Time builds do not care about losing Critical Strike Chance, for example, or compensate it.
Recommended Duplicitous Soul Splinters setup to can be looked up in Gems and Runewords.
Diablo II Runewords Gear
In Season 15 some Diablo II runes, like 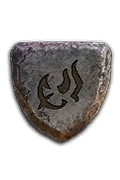 Ral or
 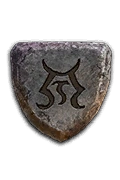 Ith were reintroduced for the season, as the cherry on top. While being not impressive on their own – they can be used to craft new Unique gear piece by combining certain runewords and Normal “white” item base inside Horadric Cube. There are few the most impressive outcomes, like
 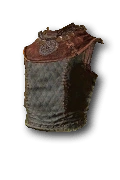 Enigma (Jah Ith Ber),
 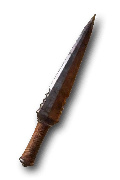 Spirit (Tal Thul Ort Amn),
 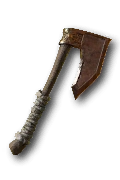 Grief (Eth Tir Lo Mal Ral) or
 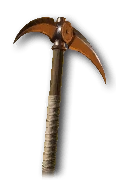 Infinity (Ber Mal Ber Ist). Ancestral version of item base will produce the Ancestral version of Unique.
For a complete overview of the current Season, its mechanics and theme, new leveling activities, and other changes, please take a look at our comprehensive season hub here.
Talismans
The Lord of Hatred expansion introduces Talismans as a new character progression and itemization layer. Find, equip, and fill a suitable Horadric Seal with a variety of Charms. These grant everything from plain stats similar to any gear piece to powerful set effects, doubling down on and elevating Necromancer archetypes to new heights.
This builds Talisman goalposts would be:
- Horadric Seal with the most Charm Slots possible
- Charms and Seals with valuable affixes, like:
- + 1 Charm Slot
- +% Attack Speed
- +% Movement Speed
- +%[x] Damage
Mercenaries
Mercenaries are unlocked during the main questline in the Vessel of Hatred expansion. Follow this guide on how to acquire each Mercenary and the benefits they provide.
The recommendation for this build is to hire Varyana as soon as possible due to the damage multipliers he brings to the table. Below you’ll find the list of his skills you want to use:


Use the Reinforcement slot to level up all your remaining mercenaries to get  Pale Marks and all possible caches for extra loot:
- Aldkin: Cast
 Haunt when the player uses any skill in combat.
 - Varyana : Cast
 Bloodthirst or
  Shockwave when the player casts any skill in combat.
 - Subo: Cast
 Wire Trap when the player casts any skill in combat.
Build Mechanics
Once the build gets going we don’t rely on Wrath instead we rely on passive skills and set-and-forget skills to support our Rampage damage ouput. The rotation below will elaborate further on how we play the build and why it works.
Rotation and Playstyle
Before Metamorphosis rotation:
 Command Fallen – We use this first to get 3 permanent minions out (re-summon if they die). They help with our Dominance generation passively on top of their generic damage output.
 Sigil of Subversion – This gives us stacks of Shadowform but also a bit of movement speed!
 Terror Swarm – A good amount of damage output but has a cooldown so use when available. You can re-position it by recasting it.
 Command Laalish – Another source of good damage output. If you’re in range you also get Shadowform stacks! This applies both Vulnerable, weaken and slow making it our main source of Vulnerable application.
- Rampage – Our main source of damage output. He only costs 15 Dominance with a 10 second cooldown. However, during those 10 seconds that he is summoned you can re-cast him for free providing massive damage output at no resource cost. Essentially, spam this skill!
 Nether Step – Used for speeding up your general movement speed and/or to get out of harms way when needed in boss fights.
Season Updates
Below you’ll find the most noteworthy changes for Season 15 Hell’s Legacy:
- Terror Swarm base damage buffs
- Fixed bug where casting or moving during Nether Step would break Shadowform’s Stealth.
For a complete overview of the current Season, its mechanics and theme, new leveling activities, and other changes, please take a look at our comprehensive season hub here.
Changelog
- September 15th, 2026: Guide updated for Season 15.
- June 27th, 2026: Guide updated for Season 14.
- April 30th, 2026: Guide Added.