


Build Introduction
The Diablo Auradin has returned! Similar to the Dream and Dragon Paladins of Diablo 2, this Paladin kills not through attacks but simply by running nearthe monsters and letting the Auras obliterate all nearby foes.  Holy Light Aura will be our primary source of damage, however, this build really takes off with the Unique Gloves
  Dawnfire. Thankfully, they are not too difficult to obtain, thus making this an easy build to get running.
This character was recently buffed in the past Seasons and should be a top build for the Paladin.
Strengths and Weaknesses
- Can Farm All Areas
- Powerful defensive utility and survivability.
- Very Low Skill Requirement
- Close Range
- Requires Unique to Get Started
Build Requirements
This build technically can function without any uniques, but there are two that will really help improve the build. More Uniques that have been added in Season 15 are listed in the Uniques section of the guide. Additionally, more Legendary Aspects are listed in the Gear section, but the ones listed here are the most important.
Dawnfire Sundered Night
 Aspect of Celestial StrifeAspect of AscensionAspect of Holy Punishment
 Aspect of the IndomitableAspect of Interdiction
- Dawnfire– Gloves that change Holy Light’s passive to deal X Fire Damage around you each second that grows with every kill.
- Sundered Night – A 2-handed Axe that makes Casting an Aura skill trigger
 Consecrationbeneath you while also increasing Aura Potency. You can also choose to run
  Griswold’s Opus if you wish to run a 1-hander with a shield. It is an effective variant as well.
Quick Navigation
Want to skip ahead? Use the table below to jump to the sections you are looking for.
Skill Bar and Skill Tree Points
Your skill bar should contain the following six skills. The location of these skills doesn’t matter, place them wherever is comfortable for you.
 Rally
Rally Falling Star
 Advance
 Fanaticism Aura
 Defiance AuraHoly Light Aura
Paladin Class Mechanic – Oaths
Paladins are able to devote themselves to one of four Oaths which drastically change your gameplay and give you access to some new resources that allow you to take your build even further. Each Paladin archetype is represented in the Oath system, allowing players to choose between Zealot, Juggernaut, Judicator, or Disciple. For this build, we will want to take the Disciple Oath.
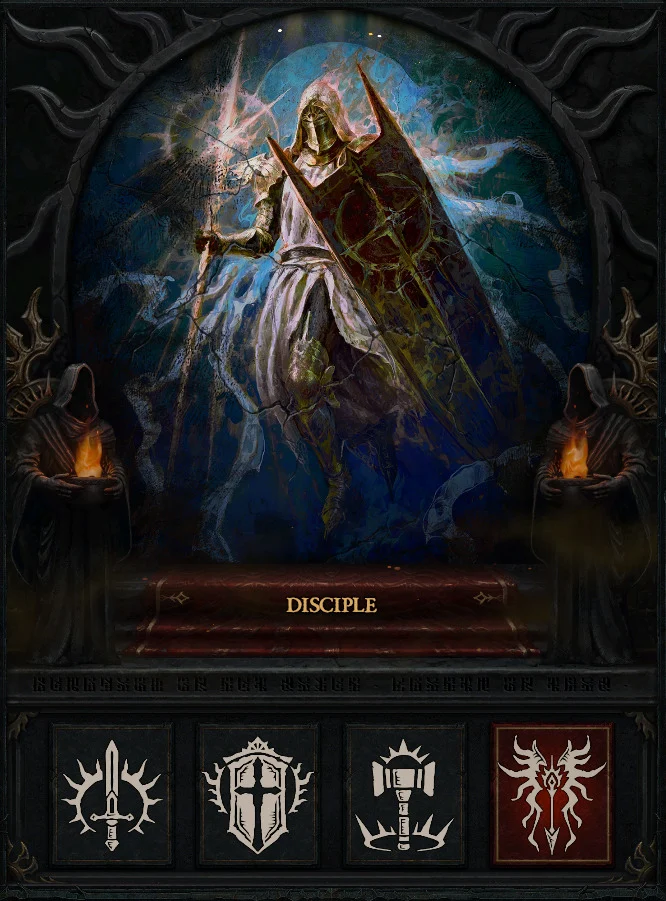
Under this Oath, whenever we cast a Disciple Skill (Falling Star in our case), we are granted Arbiter form for 4.5 Seconds. With our Cooldown Reduction and additional charge, we should be able to maintain permanent form!
Gear, Stats, Gems and Runes
The following sections will cover all systems that are critical if you want to improve the power of your character and move towards the highest difficulties in the endgame of Diablo 4. Early on while leveling, you can focus on simply getting higher item power, but in the later part of the game the item power starts to become the same for everything and the affixes and legendary aspects are a more important focus.
Uniques
Remember that Dawnfirewill be a massive boost to this build and should be equipped as soon as possible upon finding it. As you level you can use a Legendary Glove with an Aspect but this will not last you the entire game. Additionally, Sundered Night or Griswold’s Opus are two weapon choices depending on if you wish to a one or two-handed build. Both are good, however if you do run one hand with a shield you will want to adjust your skill tree slightly to add nodes that give benefit for blocking.
This season has also added in some new Uniques, many of which seem quite strong.
- Leoric’s Crown – This item counts as Jewelry and increases the effect of any gem socketed by 75-100%. If Soul Splinters can be socketed here this could be insanely strong.
- Squirt’s Blouse – While not taking Damage, you take up to 50% and deal up to [30 – 50]%[x] more damage. This bonus is reset upon losing Life. A fantastic damage boost for builds that can maintain max life.
- Stone of Jordan – All of your Resistances match your highest single Resistance type. Boosts the damage of that specified matched type. A fantastic defensive Ring that also has huge offensive power in the right build.
- The Furnace – A two-handed mace that makes you deal [150 – 200]%[x] more damage to Elites. Can be Charmed as well and is one of the best candidates for it.
Legendary Aspects
Below you will find all of the best-in-slot Aspects found on Legendary Items that are important for this build. Remember that all Legendary Powers can be added into your Codex of Power once you salvage the items. You can still find some aspects through dungeons, though they will always be at the minimum power level. To get the most out of this system, combine these Aspects with the right stats and unique items.
This list assumes you have no unique items. Certain Uniques discussed in this guide will be improvements to the items below and should replace them once found.
| Gear Slot | Gems | Aspect / Unique | Aspect / Unique Power |
| Helm |  Bac & Bac & Ohm OR Ohm OR  Grand Ruby Grand Ruby | Aspect of Firm Decree | Judging an enemy grants you [20-30%] Damage Reduction for 8 seconds |
| Chest |  Cir & Cir &  Gar Runes OR Grand Ruby Gar Runes OR Grand Ruby | Aspect of Interdiction | Gain [2.0 – 3.0%] Block Chance per Resolve stack |
| Gloves | N/A | Aspect of Holy Punishment | Holy and Fire damage are increased by [40-60%]X |
| Pants | Grand Ruby | Aspect of the Indomitable | Gain up to [30-45%] Damage Reduction and Impairment Resistance based on your Block Chance |
| Boots | N/A |  Wildbolt Aspect Wildbolt Aspect | Every [3.5 – 1.5] seconds, Distant enemies are Pulled In to you and take 10%[x] increased damage for 3 seconds. This effect cannot occur while you are in Stealth. |
| Amulet |  Grand Diamond Grand Diamond | Aspect of Celestial Strife | While in Arbiter form, kills grant [1.0 – 1.5%]X increased Vulnerable damage up to a maximum of [50-75%]X |
| Ring 1 | Grand Diamond | Aspect of Ascension | Casting a Skill that grants Arbiter form increases your damage by [5-7%]X stacking up to 10 times. All stacks are lost when leaving Arbiter form |
| Ring 2 | Grand Diamond | Virtuous Aspect | Using a Valor skill increases your damage by [40-60%]X for 7 seconds |
| Weapon | Grand Ruby | Aspect of Utmost Glory | While Healthy your Skills deal [20 – 35]%[x] increased damage. Double this bonus against Weakened enemies. |
| Shield | Grand Ruby | Aspect of Proselytizing | Judicator Skills have a 40% chance to chain to a Close enemy for [50 – 150]%[x] of their damage. If no enemy is within range, damage the initial target instead. |
To see how this build compares to the others on our site, you can check out our Endgame Tier List.
Stat Priority and Tempering Affixes
Below are the affixes to prioritize on gear. Each line of affixes is listed in order of importance. Tempering Manuals and their recommended affixes are provided in the second column, and the bolded yellow affixes are the most important targets for the Masterworking Capstone Upgrade. Be sure to check out our Tempering and Masterworking guides for more details about these topics.
| Slot | Gear Affixes | Tempering Affixes |
| Helm | 1. Cooldown Reduction 2. Strength 3. Armor 4. Maximum Life | +[2-3] Maximum Resolve Stacks |
| Chest | 1. Strength 2. Maximum Life 3. Armor 4. Resistance to All Elements | +[2-3] Maximum Resolve Stacks |
| Gloves | 1. Cooldown Reduction 2. Critical Strike Chance 3. Critical Strike Damage 4. Strength | Aura Innovation – Holy Light Aura Potency |
| Pants | 1. Strength 2. Maximum Life 3. Armor 4. Resistance to All Elements | +[2-3] Maximum Resolve Stacks |
| Boots | 1. Movement Speed 2. Strength 3. Armor 4. Resistance to All Elements | Movement Speed  Natural Motion Natural Motion |
| Amulet | 1. Movement Speed 2. Cooldown Reduction 3. Critical Strike Chance 4. Strength | Aura Innovation – Holy Light Aura Potency |
| Ring 1 | 1. Critical Strike Damage 2. Critical Strike Chance 3. Cooldown Reduction 4. Damage % 5. Strength | Guardian Finesse – Damage while in Arbiter Form |
| Ring 2 | 1. Critical Strike Damage 2. Critical Strike Chance 3. Cooldown Reduction 4. Damage % 5. Strength | Guardian Finesse – Damage while in Arbiter Form |
| Weapon | 1. Strength 2. Maximum Life 3. Critical Strike Damage 4. Vulnerable Damage | Guardian Finesse – Damage while in Arbiter Form |
| Shield | 1. Cooldown Reduction 2. Strength 3. Armor 4. Vulnerable Damage | Paladin Guard – +1-2 to En Garde |
Iconic Mythic
Below you will find information about the Iconic Mythics that are useful to this build. Moreover, if you are interested in target farming Iconic Mythics, check out our How to Farm Iconic Mythics guide.
These are the chase rare items in Diablo 4. They have a very low drop rate from most content and a slightly higher drop rate from Tormented Bosses in Torment 1 and beyond. We will be listing only the ones useful to this build. If an iconic mythic is not listed here, it is not useful to this build but may be useful to other setups. Let’s take a look.
 Shroud of False Death – An extremely powerful chest. Paladin has amazing passives, and if you’re lucky enough to find one, the power it provides through that alone is worth dropping your normal chest for. The additional stats and life are also helpful, as is the stealth bonus, which can help you speed through large areas quickly.
Gems and Runewords
Listed below are the best gems to socket into gear for each slot type.
Gems
| Weapon Gems | Armor Gems | Jewelry Gems |
| Grand Ruby for increased Holy Damage | Grand Ruby for increased Strength | Grand Diamond for increased Resistance to All Elements |
Runes
Runewords return from Diablo 2 in Vessel of Hatred! You are limited to two Runewords across your gear and it requires two sockets in the same item. So this limits creating Runewords by combining two Runes to either Helm, Chest, Pants, or Two-Handed Weapons. We recommend putting these in some combination of your Helm, Chest, or Pants.
| Rune Name | Rune Effects |
 Igni Igni | Gain 25 Offering: Stores offering every 0.3 seconds. Cast a Non-Basic Skill to gain the stored offering |
 Ceh Ceh | Summon a Spirit Wolf to attack enemies for 8 seconds |
| Cir | Gain 300 Offering: Cast 5 Skills then become exhausted for 3 seconds. |
| Gar | Requires 25 Offering (Overflow: Gain multiple stacks): Gain 2% Critical Strike Chance for 5 seconds, up to 10% |
| Bac | Travel 5 meters. |
| Ohm | Invoke the Barbarian’s War Cry Skill, increasing your damage dealt by 7.5% for 6 seconds. |
Paragon Board
We recommend using the following Legendary Nodes and Glyphs to truly take this build into the endgame. Note that each glyph’s information and radius listed below is for the level 150 Version. As a reminder, glyph’s reach their maximum radius at level 51 and unlock their Legendary Bonuses at level 50.
The main focus on each board is to rush to the Legendary Node followed by the Glyph. Beyond that, focus on Armor and Damage Nodes
You can find the Paragon Board Setup HERE:
Season 15 Mechanics
In Season 15, you will be able to acquire powerful Soul Splinters that embody great evils. There are eight in total, and they can drop as Magic, Rare, Legendary, or Unique. You can use the Amalgamation recipe in the Horadric Cube to upgrade them from one rarity to the next.
We recommend the following Soul Splinters:
- Splinter of Anguish: Passive tons of fire res. Effect: You gain +35% Critical Strike Chance and Attack Speed, but your Primary Resource Costs are increased by 30%
- Splinter of Pain: you gain 40% Damage Reduction but lose 30% Movement Speed
- Splinter of the Black Soulstone: Killing enemies gains a soul for 15 seconds. Each soul increases your damage by 5%x but also increases your damage taken by 0.5% This effect stacks but does not refresh
For an overview of Diablo 4’s latest season CLICK HERE!
Talisman
Lord of Hatred introduces Talisman Sets. The Talisman is a Seal and Charms are placed within. Charms have some general affixes from a limited pool and can have Set bonuses which can grant significant power.
For our Seal, we will want a Legendary Seal with +1 Charm Slots so we can access all six charms. During the leveling portion of the game this may not be easily attained so just use what you can until you can eventually get the +1 Charm Slot.
For the other affixes look for anything that adds bonuses while using the Cathan’s Iron Conviction charm set such as damage reduction, faith generation, movement speed or resistances.
For our Charms, we will want to use the 5-piece charm set Cathan’s Iron Conviction which will grant us the following bonuses:
- 2 Set: Gain 55% Aura Potency
- 3 Set: Your Aura skills gain all of their upgrades. Your Aura skills no longer take Faith to Cast. Grants 30% Damage Reduction.
- 5 Set: Gain Conviction Aura, increasing the damage nearby enemies take from all sources by 0.5%X per Skill Rank you have in all your Aura skills
For our sixth and final charm slot, we will want to use a Unique Charm. The following are all great picks depending on your gear.
- The Furnace
- Stone of Jordan
- Squirt’s Blouse
-
 Herald of Zakarum
 -
 Sundered Night
Mercenaries
As you play through the campaign in Vessel of Hatred, you will unlock various NPC Mercenaries who can join you on your quest to slay demons. Each Mercenary has their own small talent tree that will give them bonuses and skills to help you. Additionally, you can assign a Mercenary that you don’t take with you as a reinforcement to jump in when you activate certain skills. Let’s take a look at how we want to set them up for this build.
We hare Raheir, the Shieldbearer
- Core Skill:
 Ground Slam
 - Core Skill Passive:
 Raheir’s Aegis
 - Iconic Skill:
 Bastion
 - Iconic Skill Passive:
 Inspiration
Our reinforcement Mercenary will be Varyana, the Berserker Crone
- Opportunity Skill: Skill Cast in Combat
- Reinforcement Skill:
 Bloodthirst
Build Mechanics
Rotation and Playstyle
The endgame setup for the Auradin focuses on running around using your mobility skills to keep Arbiter Form up while your Holy Light Aura crushes everything
For Damage, thanks to the Legendary Paragon Node, Castle, we can stack armor for a massive multiplier of damage. Let’s review our skills and how to move around maps.
- Cast Falling Star to get into Arbiter Form
- Activate Fanaticism Aura to apply Weakened to nearby enemies and elites/bosses.
- Activate Holy Light Aura to proc Consecration from Sundered Night
- Activate Defiance Aura to become Unstoppable for 2 seconds whenever you become Crowd Controlled or to prevent yourself from being Crowd Controlled in the first place while you cut up your foes. Defiance Aura also boosts Armor (which is more damage) and Resistances so feel free to press it whenever it comes off cooldown.
- Cast Advance to move around a little bit more and restore Faith if necessary. Generally, you will not be casting this skill that often though.
- Cast Rally to regenerate Faith whenever necessary and Speed up! With all of your healing you should be able to cast this pretty often.
Season Updates
For a complete overview of Season 15, its mechanics and theme, new leveling activities, and other changes coming with the Season of Hell’s Legacy, please check out our Season Hub!
Let’s take a look at the changes to Paladin and this build
- Core Strength Stat Scaler increased from 1.25 to 1.625 – 30% damage buff
- Disciple Oath damage per increased from 80% to 100%
- Cathan’s Iron Conviction: 5-Piece Set Bonus: Duration increased from 10 seconds to 15 seconds.
Obol Gambling
A final point on acquiring gear is using your Obols to target farm specific slots instead of randomly spending them on random drops. Similar to Kadala in Diablo 3, you can use Obol Vendors in towns to try and get what you’re missing. With the expansion when a level 70 Character spends obols, all gear from the vendors will be at least 850 item power, the highest non-ancestral power allowing you to fill out gear with the affixes or Legendary Aspects you need while also having a small chance to grant Ancestral Items, Uniques, and even Iconic Mythics!
Check out our Obol Gambling Tool Guide HERE.
Changelog
- September 15th 2026: Updated Season 15 Changes
- June 29th 2026: Guide updated for Season 14
- May 14th 2026:Adjusted Aspects and Updated some text
- April 27th 2026: Guide updated for Season 13 & Expansion
- March 6th, 2026: Guide updated for Season 12
- January 3rd, 2026: Guide Created