

Build Introduction
The point of this leveling guide is to quickly take your character from 1 to 70 while using Juggernaut Skills and prepare for your transition into the endgame. This guide will walk you through the skill point placement for levels 1-70 and give some insight into how each skill and modifier work together to create the synergies needed to be able to tackle whatever form of leveling you choose to take. We will also give some insight on Legendary Aspects, Affixes, and Gems we can utilize to accelerate our journey.
The Skill Tree has changed in the new expansion, so passive nodes are gone, and skills are now locked behind levels instead of the number of points placed in previous tiers.
Quick Navigation
Allocation of Skill Points
Below is the recommended order for spending your points as you level up. If you are missing skill points, complete the Season Ranks to earn the additional points as you progress your journey.
Skill Bar and Skill Tree Points
 Blessed Shield
 Holy Light Aura
 Aegis
Aegis Rally
Rally Defiance Aura
 Clash
ClashIf you are unsure how best to use these skills, read our Build Mechanics section after setting up your skill bar.
Wondering what comes after level 70 or which Paragon Boards to choose? Head to the Paladin Builds Page and choose an endgame build to continue progressing your character beyond level 70 and into the endgame.
Paladin Class Mechanic – Oaths
Paladins are able to devote themselves to one of four Oaths which drastically change your gameplay and give you access to some new resources that allow you to take your build even further. Each Paladin archetype is represented in the Oath system, allowing players to choose between Zealot, Juggernaut, Judicator, or Disciple. For this build, we will want to take the Juggernaut Oath.
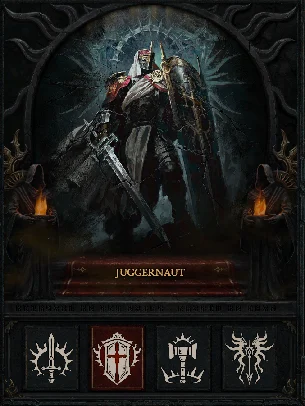
Under this Oath, whenever we cast a Juggernaut skill, it consumes 8 stacks of Resolve to increase our damage by 100% and the size of our skills by 20% for 5 seconds. It also changes resolve to have an extra stack and no longer be consumed on hit. With our Resolve generation, we should be able to get 8 stacks every 5 seconds and have no problem maintaining this buff.
Gear, Stats, Gems, and Runes
When selecting your items, higher item power generally indicates stronger gear, but you also need to consider the affixes and effects that are relevant to your class and your build. When making gear decisions during leveling, keep an eye out for both the item power and specific attributes that complement that build.
Legendary Aspects
For general information on how to unlock the Codex of power, head to our Aspects and Codex of Power Guide. You can also imprint aspects onto items by visiting The Occultist in towns.
Listed below are all the aspects that are important to this build as well as what slot they are best placed in. However, you can move the slots around during the leveling process, especially since early on some of these aspects can only be found via random drops and might not be in the most ideal slot.
| Gear Slot | Legendary Aspect/Unique | Aspect Power |
| Helm |  Aspect of Glynn’s Anvil Aspect of Glynn’s Anvil | Your maximum Resolve is increased by 2 and you gain [3-4%] Damage Reduction per Resolve |
| Chest | Aspect of Interdiction | Gain [2.0 – 3.0%] Block Chance per Resolve stack |
| Gloves |  Aspect of the Juggernaut’s Covenant Aspect of the Juggernaut’s Covenant | Consume Resolve stacks with Juggernaut Oath grants an additional x[60-100%] damage. |
| Pants | Aspect of the Indomitable | Gain up to [30-45%] Damage Reduction and Impairment Resistance based on your Block Chance |
| Boots |  Aspect of Swift Spirit Aspect of Swift Spirit | Losing Resolve rants [3.0-5.0%]X Movement Speed for 10 seconds, stacking up to 5 times |
| Amulet | Aspect of Chastisement | Your Juggernaut Skills deal x[55-75%] increased damage to Bosses and Crowd Controlled enemies. |
| Ring 1 | Virtuous Aspect | Using a Valor Skill increases your damage by x[40-60%] for 7 seconds. |
| Ring 2 | Vanguard’s Aspect | Juggernaut Skills deal x[100-140%] increased damage to the first 3 enemies hit |
| Weapon (1-Handed or 2-Handed) | Aspect of Utmost Glory | While Healthy, your skills deal [20-35%]X increased damage. Double this bonus against Weakened enemies |
| Shield (If using 1-Handed) | Bulwark’s Aspect | You no longer Dodge, but you gain [20-30%] Block Damage Reduction and 15%+ Block Chance |
Stat Priority and Tempering Affixes
During your leveling journey, you may stumble across items with incredible affixes. Tempering these items can provide you with a significant boost in power, so make sure you understand how tempering works!
As a reminder, tempering is only possible if you’ve found the tempering manuals while leveling.
Keep an eye out for the following stats that are beneficial for this build. We will list the most ideal stats and best tempering affix if you’re lucky enough to find the right manual, however, these are not the only affixes you can use.
| Gear Slot | Targeted Affixes | Tempering Affix |
| Helm | 1. Cooldown Reduction 2. Strength 3. Maximum Life 4. Resistance to All Elements 5. Armor | +[2-3] Maximum Resolve Stacks |
| Chest | 1. Strength 2. Maximum Life 3. Armor 4. Resistance to All Elements | +[2-3] Maximum Resolve Stacks |
| Gloves | 1. Attack Speed 2. Cooldown Reduction 3. Critical Strike Chance 4. +Ranks to Core Skills | Guardian Finesse – Juggernaut Damage |
| Pants | 1. Strength 2. Maximum Life 3. Armor 4. Resistance to All Elements | +[2-3] Maximum Resolve Stacks |
| Boots | 1. Movement Speed 2. Strength 3. Maximum Life 4. Resistance to All Elements 5. Armor | Movement Speed |
| Amulet | 1. Strength 2. +Ranks to Juggernaut Skills 3. Physical Damage Multiplier 4. Critical Strike Chance | +[2-3] Maximum Resolve Stacks |
| Ring 1 | 1. Cooldown Reduction 2. Attack Speed 3. Critical Strike Chance 4. Critical Strike Damage | Juggernaut Damage |
| Ring 2 | 1. Cooldown Reduction 2. Attack Speed 3. Critical Strike Chance 4. Physical Damage Multiplier | Juggernaut Damage |
| Weapon (1-Handed or 2-Handed) | 1. Strength 2. Maximum Life 3. Critical Strike Damage 4. Damage% | Juggernaut Damage |
| Shield (If using 1-Handed Weapons) | 1. Damage Reduction 2. Armor 3. Maximum Life 4. Resistance to All Elements | Juggernaut Damage |
Gems
Listed below are the best gems to socket into gear for each slot type.
- Weapons:
 Skull for Physical Damage
 - Armor:
 Ruby for more Strength
 - Jewelry:
 Diamond for resistance to all elements
Runes
While leveling in Diablo 4, you may come across Runes, a unique gem that can be placed into an item with two sockets such as a helm, chest, pants, or two-handed weapon. Putting one Ritual Rune and one Invocation Rune into the same item creates a Runeword, which can enhance your gameplay and grant powerful boons. Ritual Runes generate Offering when the conditions are met, and once enough Offering has been met, the associated Invocation Rune’s effect will trigger. Here are some early rune suggestions for leveling if you’re fortunate enough to find them.
Place these runes in whatever combinations desired based on how you are using Skills.
| Rune Name | Rune Effect |
 Cir Cir | Gain 300 Offering: Cast 5 Skills then become exhausted for 3 seconds. |
 Gar Gar | Gain 2% Critical Strike Chance for 5 seconds, up to 10%. |
 Moni Moni | Gain 100 Offering: Cast 2 Mobility or Macabre Skills |
 Qua Qua | Restore an Evade charge and gain 6% Movement Speed for 5 seconds, up to 30%. |
Season 15 Mechanics
In Season 15, you will be able to acquire powerful Soul Splinters that embody great evils. There are eight in total, and they can drop as Magic, Rare, Legendary, or Unique. You can use the Amalgamation recipe in the Horadric Cube to upgrade them from one rarity to the next.
We recommend the following Soul Splinters:
- Splinter of Anguish: Passive tons of fire res. Effect: You gain +35% Critical Strike Chance and Attack Speed, but your Primary Resource Costs are increased by 30%
- Splinter of Pain: You gain 40% Damage Reduction but lose 30% Movement Speed
- Splinter of the Black Soulstone: Killing enemies gains a soul for 15 seconds. Each soul increases your damage by 5%x but also increases your damage taken by 0.5%. This effect stacks but does not refresh
For an overview of Diablo 4’s latest season CLICK HERE!
Talisman
Lord of Hatred introduces Talisman Sets. The Talisman is a Seal and Charms are placed within. Charms have some general affixes from a limited pool and can have Set bonuses which can grant significant power.
For our Seal, we will want a Legendary Seal with +1 Charm Slots so we can access all six charms. During the leveling portion of the game, this may not be easily attained, so just use what you can until you can eventually get the +1 Charm Slot.
For the other affixes, look for anything that adds bonuses while using the Cathan’s Righteous Will charm set such as damage reduction, faith generation, movement speed or resistances.
For our Charms, we will want to use the 5-piece charm set Cathan’s Righteous Will, which will grant us the following bonuses:
- 2 Set: Enemies cower before you, becoming Feared and Immobilized for 0.5 seconds when they first see you or when you Block them
- 3 Set: You reflect Stun and Knockback effects. Your minimum Resolve is increased by 2 and your Maximum Resolve is increased by 2 and you gain 10%+ Damage Reduction for each Minimum Resolve you have
- 5 Set: When you try to Crowd Control a worthy enemy, one that can’t be Crowd Controlled, you rise to the occasion gaining 500%X increased damage for 10 seconds
For our sixth and final charm slot, we will want to use a Unique Charm. Some candidates in order for this are:
- The Furnace – you deal [150 – 200]%[x] more damage to Elites
 Herald of Zakarum – Gain [40 – 50]%[x] increased Strength, Resistance, Armor, and Retribution Chance.
- Squirt’s Blouse – While not taking Damage, you take up to 50% and deal up to [30 – 50]%[x] more damage
- Stone of Jordan – All of your Resistances match your highest single Resistance type. Boosts the damage of that specified matched type.
Mercenaries
As you play through the campaign in Vessel of Hatred, you will unlock various NPC Mercenaries who can join you on your quest to slay demons. Each Mercenary has their own small talent tree that will give them bonuses and skills to help you. Additionally, you can assign a Mercenary that you don’t take with you as a reinforcement to jump in when you activate certain skills. Let’s take a look at how we want to set this up for this build
We hire Raheir, the Shieldbearer
- Core Skill:
 Ground Slam
 - Core Skill Passive:
 Raheir’s Aegis
 - Iconic Skill:
 Bastion
 - Iconic Skill Passive:
 Inspiration
Our Reinforcement Mercenary will be Varyana, the Berserker Crone
- Opportunity Skill: Skill Cast
- Reinforcement Skill:
 Bloodthirst
Build Mechanics
Rotation and Playstyle
- Clash – Our basic skill, use this to generate faith early on and gain Resolve, Block Chance, and to enter “Crusader’s March”
- Blessed Shield – The Core Skill that we will be using in-between any cooldown skill to deal large damage thanks to our Juggernaut Oath. Also pulses your Thorns damage for extra damage.
- Aegis– A quick way to increase our Block, become Unstoppable, and increase Thorns damage. Use to escape a tricky situation or to dive in for a damage boost.
- Defiance Aura – A passive defensive aura that will increase our damage (Armor) and upon activation give a massive boost to thorns damage and pulses.
- Holy Light Aura – Provides Healing and Fortification to increase our damage and survivability.
- Rally– A supportive buff that restores Faith and grants movement speed. Spam this constantly to move around as we have plenty of ways to regenerate life.
There are currently no Justice Skills being used in this build however  Consecration could be used as an alternative to Holy Light Aura if desired.
There are currently no Ultimate Skills being used in this build, as  Fortress simply takes too long, however it is still a powerful skill and can be considered as a sixth skill.
Resolve
Resolve is a damage reducing effect. While we have any stacks of Resolve, we gain 20% damage reduction. Getting hit by an enemy removes one stack of Resolve no matter how big the hit was. You can hold a certain number of Resolve stacks, the default is 8 stacks but this can be increased through some Legendary Aspects, Unique Items, and Tempering. Focusing on increasing these stacks will be beneficial to increasing all of our stats thanks to the various modifiers and Tempers the Paladin uses.
Season Updates
For a complete overview of Season 15, its mechanics and theme, new leveling activities, and other changes coming with the Season of Hell’s Legacy, please check out our Season Hub!
Let’s take a look at the changes to Paladin and this build
- Core Strength Stat Scaler increased from 1.25 to 1.625 – 30% damage buff
- Juggernaut Oath damage per increased from 80% to 100%
- Blessed Shield: Shield of Retribution now also scales the percent of Thorns it deals with Skill Ranks.
- Blessed Shield: Shield of Justice Variant – Blessed Shield detonates Judgement and ricochets 5 additional times. Whenever Blessed Shield detonates Judgement, it empowers your next throw of Blessed Shield to deal 40%[x] increased damage, up to a maximum 5 times and it increases your Judgement damage by 50%[x] for 5 seconds.
- Shield Bash: Lay Siege Variant damage increased from 246% to 349%.
- Shield Bash: Smite Variant initial damage increased from 287% to 451% and secondary damage increased from 102% to 307%.
Difficulty & Endgame
Once you hit level 70 with this build, you will be ready to tackle harder difficulties as you transition into more challenging content. Make sure to pick one of our recommended Endgame Builds to continue the journey. Additionally, we recommend keeping your Obols until your reach level 70 then spend them on a weapon to help kickstart your preferred endgame setup!
- September 15th 2026: Updated Season 15 Changes
- June 29th 2026: Guide updated for Season 14
- May 14th 2026: Removed mention of Elixirs
- May 4th 2026: Leveling Embed Added
- April 27th 2026: Guide updated for Season 13 & Expansion
- March 6th 2026: Guide updated for Season 12.
- December 21st 2025: Guide created for Season 11.