Build Introduction
Welcome to the comprehensive guide for the ![]() Hammer of the Ancients Barbarian at endgame, utilizing insane overpowers and powerful slams to annihilate anything in your way. Bosses? No problem. Nightmare Dungeons? Easy. The Pit? Trivial. With the new Runewords, new Paragon Glyph Levels, New Uniques, and the power of more skill points, this Vessel of Hatred version of a beloved Barbarian build has little problem turning demons in front of them into paste. Let’s dive in!
Hammer of the Ancients Barbarian at endgame, utilizing insane overpowers and powerful slams to annihilate anything in your way. Bosses? No problem. Nightmare Dungeons? Easy. The Pit? Trivial. With the new Runewords, new Paragon Glyph Levels, New Uniques, and the power of more skill points, this Vessel of Hatred version of a beloved Barbarian build has little problem turning demons in front of them into paste. Let’s dive in!
Strengths and Weaknesses
- Strong AoE damage style
- Huge damage numbers
- Easily stuns enemies
- Tons of Unstoppable uptime for escaping crowd control
- Requires managing weapon swaps
- Requires cooldown management
- Stationary and little mobility
- Getting the biggest numbers requires some endgame uniques
Build Requirements
 Aspect of Ancestral Force
 Aspect of Earthquakes
 Vehement Brawler’s Aspect
Want to know more about the Uniques supporting this build? Jump to the Uniques Section.
Quick Navigation
Use the table below to jump to the sections you are looking for.
Skill Bar and Skill Tree Points
Wondering what to do after Level 60? Head to the Paragon Board section to power up the build even further.
Follow the points allocated in the image above for the complete build. The additional skill points are completed using the Season Journey Ranks.
Barbarian Class Mechanic – The Arsenal System
The Barbarian can wield four weapons simultaneously as well as choose a weapon expertise to use as their Technique allowing them to gain that weapon’s bonus even if they’re wielding another weapon type. Finally, the Barbarian can assign its skills to use different weapon types shuffling between Two-Handed Bludgeoning Weapons, Two-Handed Slashing Weapons, and Dual-Wield Weapons.
For ![]() Hammer of the Ancients it requires that we use our Two-Handed Bludgeoning Weapon so we don’t get to customize our weapon selection as much as other builds.
Hammer of the Ancients it requires that we use our Two-Handed Bludgeoning Weapon so we don’t get to customize our weapon selection as much as other builds.
For our Weapon Technique Slot, we will be choosing Polearm for its damage bonus while healthy (above 80% life) for more consistent damage.
Gear, Stats, Gems, and Runes
The following sections cover all systems that are important if you want to improve the power of your character in the endgame of Diablo 4.
Legendary Aspects
Each Aspect is listed with its matching gear slot. Do your best to keep each Aspect in the assigned slot. Remember to salvage Legendary Items with higher Aspect values to unlock them in the Codex of Power, and then imprint them onto gear pieces with the preferred affixes.
| Slot | Gems | Legendary Aspect/Unique | Aspect / Unique Power |
| Helm | – Casting You deal x[40-60%] increased Fire damage. | ||
| Chest |  Aspect of the Fortress Aspect of the Fortress | – For every 10% Life you are missing, gain [1-5%] Damage Reduction | |
| Gloves | N/A | – Your attacks randomly deal 1% to [200-300%] of their normal damage | |
| Pants |  Relentless Berserker’s Aspect Relentless Berserker’s Aspect | – Lucky Hit: Damaging an enemy with a Core Skill has up to a [15-35%] chance to extend the duration of Berserking by 2 seconds. Double this duration if it was a Critical Strike. | |
| Boots | N/A |  Ghostwalker Aspect Ghostwalker Aspect | – While Unstoppable and for 4 seconds after, you gain 25% + [10-30%] increased Movement Speed and are Unhindered |
| Amulet |  Aspect of Limitless Rage Aspect of Limitless Rage | – Each point of Fury you generate while at Maximum Fury grants your next Core Skill within 5 seconds x[1-3%] increased damage up to 15 times. | |
| Ring 1 |  Bold Chieftain’s Aspect Bold Chieftain’s Aspect | – Whenever you cast a Shout Skill, its active cooldown is reduced by [10-30%] per nearby enemy up to 70% | |
| Ring 2 | – After spending 100 Fury within 5 seconds, your next non-channeled Core or Weapon Mastery Skill Cast within 5 seconds is a guaranteed Critical Strike and deals x[50-80%] bonus Critical Strike Bonus | ||
| Two-Handed Bludgeoning Weapon |  Aspect of Ancestral Force Aspect of Ancestral Force | – | |
| Two-Handed Slashing Weapon |  Aspect of Earthquakes Aspect of Earthquakes | – | |
| Dual Wield Weapon 1 |  Vehement Brawler’s Aspect Vehement Brawler’s Aspect | – Casting an Ultimate Skill increases your damage by [10-30%] for 8 seconds. Gain 2 additional Ultimate Skill Ranks | |
| Dual Wield Weapon 2 |  Aspect of Anger Management Aspect of Anger Management | – While above 50 Fury, deal x[10-30%] increased damage and gain Berserking, but 3 Fury drains per second. |
To see how this build compares to the other builds on our site, you can check out our build tier lists.
Stat Priority and Tempering Affixes
Below are the affixes to prioritize on gear. Each line of affixes is listed in order of importance. Tempering Manuals and their recommended affixes are provided in the second column, and the bolded yellow affixes are the most important targets for Masterworking upgrades. Be sure to check our Tempering and Masterworking guides for more details about these topics.
| Slot | Gear Affixes | Tempering Affixes |
| Helm | 1. Cooldown Reduction 2. Maximum Life 3. Strength 4. Resistance to All Elements | Earthquake Size |
| Chest | 1. Strength 2. Maximum Life 3. Resistance to All Elements 4. Armor | Earthquake Size |
| Gloves | 1. Attack Speed 2. Strength 3. Ranks to 4. Overpower Damage | Hammer of the Ancients Size |
| Pants | 1. Strength 2. Maximum Life 3. Resistance to All Elements 4. Armor | Ground Stomp Cooldown Reduction |
| Boots | 1. Movement Speed 2. Maximum Life 3. Strength 4. Fury Per Second | Movement Speed |
| Amulet | 1. Strength 2. +Ranks to 3. + Ranks to 4. Attack Speed | Wrath of the Berserker Cooldown Reduction |
| Ring 1 | 1. Attack Speed 2. Critical Strike Damage 3. Resistance to All Elements 4. Strength | Wrath of the Berserker Cooldown Reduction |
| Ring 2 | 1. Resistance to All Elements 2. Critical Strike Damage 3. Attack Speed 4. Strength | Wrath of the Berserker Cooldown Reduction |
| 2-Handed Bludgeoning Weapon | 1. Strength 2. Maximum Life 3. Critical Strike Damage 4. Fury On Kill | Chance for Hammer of the Ancients to Deal Double Damage |
| 2-Handed Slashing Weapon | 1. Strength 2. Maximum Life 3. Critical Strike Damage 4. Fury On Kill | Chance for Hammer of the Ancients to Deal Double Damage |
| Dual Wield Weapons | 1. Strength 2. Maximum Life 3. Critical Strike Damage 4. Overpower Damage | +Ranks to |
Uniques and Mythic Uniques
Below you will find information on Unique Items and Mythic Unique Items that are useful and recommended for this setup. If a Mythic Unique is not listed here, it is NOT recommended and won’t benefit this specific build in any way.
Uniques
 Ugly Bastard Helm This helm grant us a massive multiplier to all fire damage. Though changed to only convert damage into fire during
  Wrath of the Berserker, we don’t actually need to worry about this as we run this particular ultimate and benefit from it as often as possible.
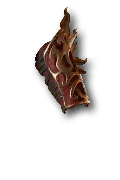 Fists of Fate even with its change in Season 8 to no longer trigger random Crowd Control effects, it still causes Vulnerable and helps our damage out by a lot. Make sure you’re wearing one that’s at least 250% or more on its Unique Power, this will make it on average, increase our damage by 25% and up to 50% with a maximum 300% roll. A powerful unique.
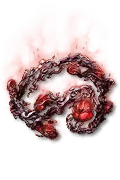 Ring of Red Furor This ring has been coming back into the limelight in the last few seasons as certain builds are able to take advantage of it. Thanks to changes Hammer is once more able to wield this to produce massive hammers and crush the demonic hoards.
Mythic Uniques
 Shroud of False Death – An extremely powerful chest item that grants +1 rank to all passive skills we have. This provides everything from some movement speed, to life, to critical hit damage, fortify and everything in between. This also increases our resource generation letting us keep slamming hammers down.
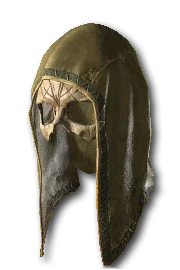 Harlequin Crest – The infamous Shako. With a huge armor bonus, 20% damage reduction, huge cooldown reduction and +4 ranks to all skills, this item is still extremely powerful providing us full uptime on shouts and our ultimate skill
  Wrath of the Berserker as well as granting a bit more damage through the ranks to hammer itself which give it even more crushing power.
Gems and Runes
Below you will find the details about why we’re using the gems we are as well as which runes we want to combine for runewords in Vessel of Hatred. Let’s jump in.
Gems
| Weapon Gems | Armor Gems | Jewelry Gems |
For your jewelry, you can freely swap between Diamonds and Skulls based on your needs. Armor and Resistances no longer have hard caps you need to hit to reach your defensive potential. Instead you can now freely swap the gems between them depending on what you need the most. Are you dying to physical strikes? Use Skulls for more armor. Are you dying to elemental abilities light lightning damage or poison pools? Use Diamonds for more resistances. Always be sure to check your Toughness stat and use what works best for you!
Runes
Runewords return from Diablo 2 in Vessel of Hatred! You are limited to two Runewords across your gear, and it requires two sockets in the same item. So, this limits creating Runewords by combining two Runes to either Helm, Chest, Pants, or Two-Handed Weapons. We generally recommend them in both of your Two-Handed Weapons for Barbarian. Let’s jump in.
| Rune | Rune Effect |
| Gain 25 Offering: Stores offering every 0.3 seconds. Cast a non-basic skill to gain the stored offering. | |
| Requires 5 Offering: Cooldown 1 second, Restore 3.5 Primary Resource | |
| Gain 15 Offering; Lucky Hit: Up to a 100% chance against non-healthy enemies | |
| Requires 400 Offering; Cooldown 1 second, Casting a Skill other than a Basic or Defensive Skill spends all of your Primary Resource to increase your damage up to 100% for 1 second. |
Paragon Boards
Paragon unlocks at Level 60 and plays a big role in endgame progression and character power. The following Legendary Nodes and Glyphs are recommended for this build. Keep in mind each Glyph’s information and radius listed below is for the level 46 version.
Season 12 Mechanics
Kill Streak System
Season 12 brings the kill streak mechanic back from previous Diablo games. As you slaughter your way through the hordes of hell you will begin a streak and get a pop-up to start tracking your kill count. Once it begins there is a short period before your streak ends. You refresh the duration of your streak with more kills, direct damage, or on the initial application of damage-over-time effects. Once the timer fully ends, you gain experience and seasonal reputation based on the level of your streak. There are five levels of kill streak based on your current kill count.
Bloodied Items
However, there is more to the kill streak system than just experience and seasonal reputation. A new type of bonus affix can appear on your Legendary items that makes the items “Bloodied” and grants bonuses based on the level of your kill streaks. There are three types. For Armor items you gain ‘Rampage’ items, for Weapons you gain ‘Feast’ items, and for Jewelry you gain ‘Hunger’ items. For this build we recommend the following Bloodied affixes:
- Armor “Rampage” – Increased Attack Speed per Kill Streak Tier
- Weapon “Feast” – Every 15 Kills, Restore 50% of your Maximum Primary Resource
- Jewelry “Hunger” – Increased chance of Rampage items during your Kill Streak
Bloodsoaked Sigils
Bloodsoaked Sigils empower content and increase Bloodied drop rewards for your Nightmare Dungeons, Infernal Hordes, and Lair Bosses. Be careful, these Sigils increase the difficulty of the content by around a full Torment level and adds a Relentless Butcher who will continually respawn and stalk you down!
Mercenaries
As you play through the campaign in Vessel of Hatred, you will unlock various NPC Mercenaries who can join you on your quest to slay demons. Each Mercenary has their own small talent tree that will give them bonuses and skills to help you. Additionally, you can assign a Mercenary that you don’t take with you as a reinforcement to jump in when you activate certain skills. Let’s take a look at how we want to set this up for this build.
We hire Raheir, the Shieldbearer
- Core Skill:
 Ground Slam
 - Core Skill Passive:
 Raheir’s Aegis
 - Iconic Skill:
 Bastion
 - Iconic Skill Passive:
 Inspiration
Our Reinforcement Mercenary will be Varyana, The Berserker Crone
- Opportunity Skill:
 War Cry
 - Reinforcement Skill:
 Bloodthirst
Build Mechanics
In this section, we will detail how to play this build, what the various skills and passives are used for and what your damage rotation should be to get the full benefit of this setup to smash the most demons and bosses. Let’s get started!
Playstyle
This build has come back to the old style of HotA that we all know and love. Big hammers dealing big damage. No more Earthquakes doing all of the damage or blowing them up via the new uniques. This is just straight forward raw ![]() Hammer of the Ancients damage thanks to the new systems and items in place that allow for some pretty wild combinations. Let’s take a deeper look!
Hammer of the Ancients damage thanks to the new systems and items in place that allow for some pretty wild combinations. Let’s take a deeper look!
Rotation
We want to build resources via our Shout skills and then begin hammering. We can use ![]() Ground Stomp to stun demons and reduce the cooldown of our ultimate skill
Ground Stomp to stun demons and reduce the cooldown of our ultimate skill ![]() Wrath of the Berserker. Each Hammer we cast will spend more and more fury refunding more and more as well giving us plenty of resources to keep casting. We’ll be triggering
Wrath of the Berserker. Each Hammer we cast will spend more and more fury refunding more and more as well giving us plenty of resources to keep casting. We’ll be triggering ![]() Ring of Red Furor frequently as well giving us guaranteed critical hits and overpowers for even bigger damage numbers.
Ring of Red Furor frequently as well giving us guaranteed critical hits and overpowers for even bigger damage numbers.
Skill Use
 Hammer of the Ancients – The bread and butter of the build. We want to be spamming this as often as our resources allow.
 Ground Stomp – We use this powerful crowd control both for its CC but also for its built in ultimate cooldown reduction via
  Strategic Ground Stomp. Its relatively short cooldown means we should be casting this quite frequently giving us some safety from the hordes but also incredibly high uptime on our next skill.
 Wrath of the Berserker – Our Ultimate of choice. We want this up as often as we can. This gives us everything from damage to berserking and makes our damage go through the roof. We’re also considered Unstoppable during this skill so we can ignore crowd control effects and can continue to keep blasting and smashing.
 War Cry – One our main methods to enter the Berserking state, it grants a large multiplier to our damage for even bigger
  Hammer of the Ancients hits. You’ll want to cast this often especially during bossing and elite packs.
 Rallying Cry – This shout grants us movement speed, resource generation (the important bit), another source of Unstoppable and some basic resources to get started. We want to press this basically on cooldown.
  Challenging Shout – Lastly this skill provides our main defensive option while doing harder content granting us a large 40% damage reduction and bonuses to maximum life while active. We want to cast this whenever we’re engaging with more difficult enemies such as elite packs and bosses or if we ever find ourselves surrounded by many many demons.
Runeword Synergy
Let’s take a quick look at the runewords we will be using for this setup and explain the interactions that help this build work.
 Igni is our first ritual rune granting us 25 offering every 0.3 seconds. This is about 75 every second and to trigger it we simply need to cast a non-basic skill to gain the stored up offering so every Hammer should trigger this rune.
 Lum is our invocation rune paired with igni. It gives us back 3.5 resources per 5 offering. So with 75 offering every second from Ignire, this is roughly 263 Fury. A gargantuan amount but we’ll need that much to keep chugging through our hammers
 Ahu is our second ritual rune, granting us 15 offering every time we lucky hit an enemy that isn’t healthy. In Diablo 4, Healthy means above 80% HP. So once a monster drops below 80%, it’s considered not healthy, so basically this rune should give us offering every time we finish something off when paired with
  Hammer of the Ancients‘s very high lucky hit chance.
 Qax is our second invocation rune paired with Ahu. This sometimes drains all of your fury (but don’t worry, our Igni+Lum combo will get it back fast) but gives you a massive 100% damage boost for 1 second for your next Hammer which should make it really destroy whatever it’s aiming for.
Which Elixirs Should You Use?
When in town you can visit the Alchemist to craft helpful elixirs which will provide a special effect and increase your experience gain. Crafting has been simplified and there are fewer specific flowers to harvest; instead, almost all herbs in the world drop as Bundles of Dried Herbs, allowing you to craft the elixirs you want. Some elixirs cannot be crafted and can only drop from things like Helltide or Nightmare Dungeons.
For this build we recommend ![]() Elixir of Resourcefulness II for the increased Fury and Fury cost reduction. The increased Fury helps us gain some bonuses from various items and the cost reduction helps keep the rotation feeling smooth. Always have an Elixir active if you can for the increased experience gain which will help you gain Paragon levels faster at endgame.
Elixir of Resourcefulness II for the increased Fury and Fury cost reduction. The increased Fury helps us gain some bonuses from various items and the cost reduction helps keep the rotation feeling smooth. Always have an Elixir active if you can for the increased experience gain which will help you gain Paragon levels faster at endgame.
Season Updates
For a complete overview of Season 12, its mechanics and theme, new leveling activities, and other changes coming with the Season of Slaughter, please take a look at our comprehensive season hub here.
Here is a quick overview of the seasonal changes relevant to this build:
 Weapons Master Fury gained reduced from 12 to 4 but damage increased from 45% to 75%x
 Warbringer % of life fortified reduced from 10% to 2% but now adds 45%x damage while fortified
Obol Gambling
A final point on acquiring gear is using your Obols to target farm specific slots instead of randomly spending them on random drops. Similar to Kadala in Diablo 3, you can use Obol vendors in town to try and get what you’re missing. With Patch 2.0 when a level 60 Character spends Obols, all gear from that vendor will be 750 item power, the highest non-Ancestral in the game, allowing you to fill out gear with the affixes or Legendary Aspects you need.
Check out our Obol Gambling Tool Guide HERE.
Changelog
- March 5th 2026: Updated for Season 12
- December 5th 2025: Updated for Season 11
- September 17th 2025: Updated for Season 10
- June 28 2025: Updated for Season 9
- April 25th 2025: Reformatted and updated for Season 8
- March 31st 2025: Updated skill tree recommendations
- January 21st 2025: Added section detailing Earthquake spawns and provided Leap variant information.
- January 19th 2025: Tooltips and Seasonal section updated for Season 7
- January 17th 2025: Build updated for Season 7.

