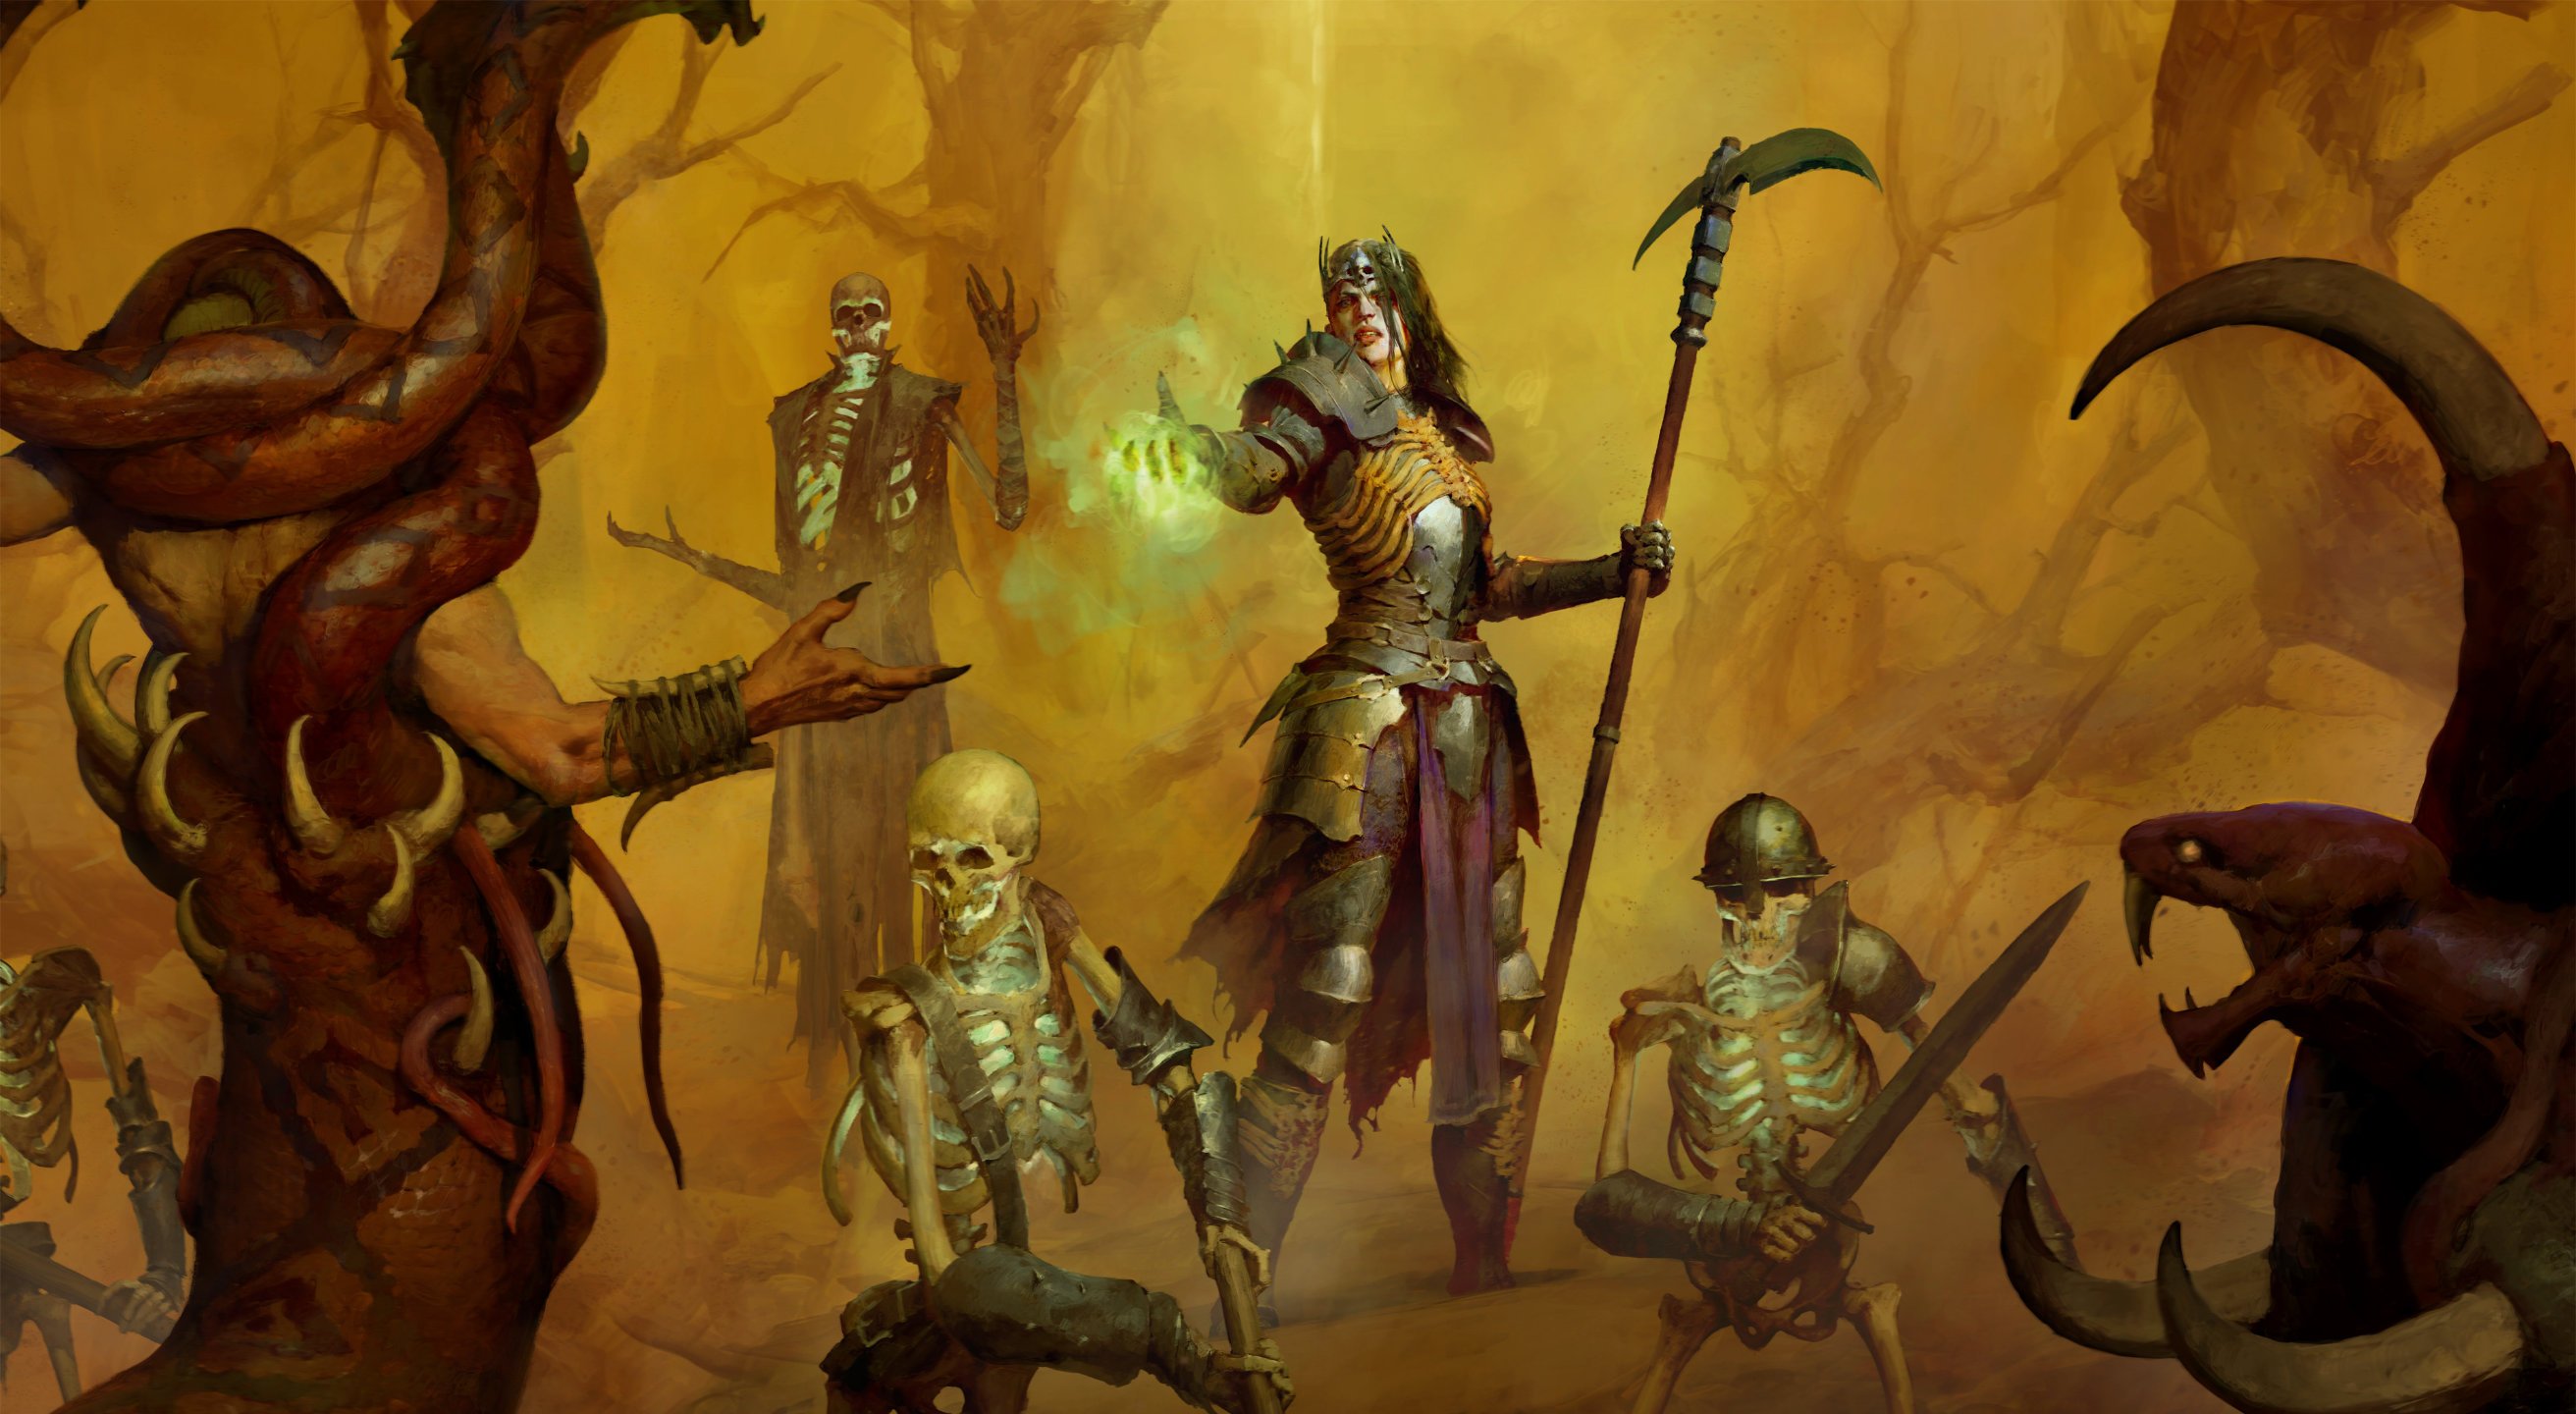


Build Introduction
The Summoner Necromancer is a staple leveling build for the Necromancer. Minions inherit all the Summoner’s stats, be it armor or resistances, attack speed or Critical Strike Chance. It allows you to focus on the Summoner’s defenses without compromising the minions and to combine the offensive potential of both.
Have questions or feedback on the guide? Join the livestream and ask me!
Quick Navigation
Want to skip ahead? Use the table below to jump to the selections you are looking for.
Allocation of Skill Points
Follow the points allocation order for the complete 71-point build. 12 skill points are locked behind the Season Rank System.
| Order | Skill | Cluster |
|---|---|---|
| 1 | Basic Skill | |
| 2 | Core Skill | |
| 3 | Corpse & Macabre Passive | |
| 4 | Corpse & Macabre Passive | |
| 5 | Corpse & Macabre Passive | |
| 6 | Corpse & Macabre Skill | |
| 7 | Core Skill | |
| 8 | Core Skill | |
| 9 | Corpse & Macabre Skill | |
| 10 | Corpse & Macabre Skill | |
| 11 | Corpse & Macabre Passive | |
| 12 | Curse Skill | |
| 13 | Curse Skill | |
| 14 | Basic Skill | |
| 15 | Basic Skill | |
| 16 | Basic Skill | |
| 17 | Corpse & Macabre Skill | |
| 18 | Corpse & Macabre Skill | |
| 19 | Corpse & Macabre Skill | |
| 20 | Corpse & Macabre Skill | |
| 21 | Curse Passive | |
| 22 | Curse Passive | |
| 23 | Curse Passive | |
| 24 | Ultimate Passive | |
| 25 | Ultimate Passive | |
| 26 | Ultimate Passive | |
| 27 | Ultimate Passive | |
| 28 | Ultimate Skill | |
| 29 | Ultimate Skill | |
| 30 | Ultimate Skill | |
| 31 | Ultimate Skill | |
| 32 | Ultimate Skill | |
| 33 | Ultimate Skill | |
| 34 | Key Passive | |
| 35 | Ultimate Skill | |
| 36 | Curse Passive | |
| 37 | Curse Passive | |
| 38 | Curse Passive | |
| 39 | Curse Passive | |
| 40 | Curse Passive | |
| 41 | Curse Passive | |
| 42 | Corpse & Macabre Passive | |
| 43 | Corpse & Macabre Passive | |
| 44 | Corpse & Macabre Passive | |
| 45 | Corpse & Macabre Passive | |
| 46 | Corpse & Macabre Passive | |
| 47 | Corpse & Macabre Passive | |
| 48 | Corpse & Macabre Passive | |
| 49 | Corpse & Macabre Passive | |
| 50 | Corpse & Macabre Passive | |
| 51 | Corpse & Macabre Passive | |
| 52 | Curse Skill | |
| 53 | Curse Skill | |
| 54 | Curse Skill | |
| 55 | Corpse & Macabre Passive | |
| 56 | Corpse & Macabre Passive | |
| 57 | Corpse & Macabre Passive | |
| 58 | Ultimate Passive | |
| 59 | Ultimate Passive | |
| 60 | Ultimate Passive | |
| 61 | Corpse & Macabre Passive | |
| 62 | Corpse & Macabre Passive | |
| 63 | Corpse & Macabre Passive | |
| 64 | Corpse & Macabre Passive | |
| 65 | Core Passive | |
| 66 | Core Passive | |
| 67 | Corpse & Macabre Passive | |
| 68 | Corpse & Macabre Passive | |
| 69 | Corpse & Macabre Passive | |
| 70 | Corpse & Macabre Passive | |
| 71 | Corpse & Macabre Passive |
Skill Tree and Skill Tree Points
We don’t use ![]() Decrepify on skill bar – it is leveled for the sake of
Decrepify on skill bar – it is leveled for the sake of ![]() Abhorrent Decrepify upgrade for
Abhorrent Decrepify upgrade for  Aspect of the Cursed Aura only.
Follow the points allocated in the Skill Tree above for the complete 71-point build. 12 skill points are locked behind the Season Rank System.
To prepare yourself for what happens after level 60 when you get access to your Paragon Board, head over to our Necromancer Builds page and choose your weapon!
Necromancer Class Mechanic – Book of the Dead
Necromancer’s class-specific ability is the Book of the Dead, which provides three different types of minions at different levels. This build is designed around using all types of your minions.
Before you reset your skills and sacrifice your minions, we’ll use the following:
- if there are no issues with
 Skeletal Warriors survivability
 - then Skeletal Warriors: Reapers [Upgrade #1] – Reaper’s wind-up attacks now reduce one of your active Cooldowns by 3 seconds.
- else Skeletal Warriors: Defenders [Upgrade #2] – Skeletal Defenders take 99% reduced damage.
- then
- Skeletal Mages: Shadow Mages [Upgrade #1] – 3%[x] increased damage for each active Shadow Mage.
 Golem: Blood [Upgrade #2] – While your Blood Golem is Healthy, they gain 25% Damage Reduction and 50%[x] increased damage.
Gear, Stats, Gems and Runes
Always prioritize higher base damage when it comes to your weapon upgrades. We always want to be wielding a 2-handed Scythe with this build, unless other weapon have significantly better damage.
Make sure you keep an eye for the Legendary Aspects to research. We have a dedicated in-depth Aspect and Codex of Power guide that you can check out for more information on gear enchanting. It is possible to participate in Obols Gambling at Purveyor of Curiosities, to gamble for ones you need.
Imprinting Aspects costs ![]() Veiled Crystals, which are easily acquired in Helltides or from salvaging rare gear and above. Prioritize salvaging gear for materials and Aspects over selling it during leveling.
Veiled Crystals, which are easily acquired in Helltides or from salvaging rare gear and above. Prioritize salvaging gear for materials and Aspects over selling it during leveling.
The table below lists the important Legendary powers you should prioritize:
| Aspect Name | Legendary Aspect Power | Source |
| Aspect of Occult Dominion (Utility) | Your maximum number of Skeletal Warriors and Skeletal Mages is increased by 2. | Random Drop |
 Aspect of Hardened Bones Aspect of Hardened Bones(Defensive) | You and your Minions gain 10-30% increased Damage Reduction | Random Drop |
 Aspect of the Unholy Tether (Mobility) Aspect of the Unholy Tether (Mobility) | Casting Golem’s active Skill creates a bond between you for 5 seconds. While the bond is active, both of you are Unstoppable and gain 45.0% Movement Speed. | Random Drop |
| Aspect of Creeping Cadaver (Mobility) | Consuming a Corpse increases your Movement Speed by + [20 – 40%] for 8 seconds. | Random Drop |
| Aspect of the Cursed Aura (Utility) | A dark aura surrounds you, inflicting Decrepify and Iron Maiden on enemies who touch it. Curses inflicted this way spread to surrounding targets every x seconds and last 4 seconds outside the aura. | Random Drop |
 Aspect of Frenzied Dead (Offensive) Aspect of Frenzied Dead (Offensive) | Each time one of your Minions damages an enemy, they gain 18.0%[+] [10.0 – 18.0]% Attack Speed for 3 seconds, up to 54.0%[+] [30.0 – 54.0]%. (Necromancer Only) | Random Drop |
| Aspect of Reanimation (Offensive) | Your Minions gain increased damage while alive, up to 60%[x] after 10 seconds. | Aldurwood in Scosglen |
| Aspect of Grasping Veins (Offensive) | Gain 25%[+] [5 – 25]% increased Critical Strike Chance for 6 seconds when you cast Corpse Tendrils. You deal 50%[x] [10 – 50]% bonus Critical Strike Damage to enemies for 6 seconds after they are damaged by Corpse Tendrils. (Necromancer Only) | Corrupted Grotto in Kehjistan |
| Blood Getter’s Aspect (Utility) | Your Skeletal Priests now also empower you at 75% [55 – 75]% effectiveness. (Necromancer Only) | Random Drop |
| Aspect of the Damned | You deal x [35 – 55%] increased Shadow damage to enemies afflicted by any Curse. | Uldur’s Cave in Kehjistan |
The priority order of Aspects on your 2-handed Weapon and Amulet:
- Aspect of Reanimation
- Aspect of Grasping Veins
- Aspect of the Great Feast
- Aspect of Occult Dominion
- Aspect of the Damned
We have a dedicated in-depth Aspect and Codex of Power guide that you can check out for more information.
Stats Priority and Tempering Affixes
Keep in mind, that Tempering Affixes are unlocked by Tempering Manuals you find as you progress. Be sure to check our Tempering guide for more details about this topic.
One of the regular affixes on gear piece can be re-rolled repeatedly until desired outcome. This is covered in our Occultist guide for more details.
There are not many modifiers worth bothering with during the leveling stage, but for this particular build:
-
 Minion Finesse +#% Summon Damage
 - +Ranks to Skeletal Warrior / Skeletal Mages / Golem Mastery
- +Ranks to Hellbent Commander
Enchanting or tempering those affixes will bring out the most from this build.
Generally you will be looking for the following Best in Slot Uniques or stats in descending priority:
| Slot | Gear Affixes | Tempering Affixes |
| 2H Weapon (Scythe preferably) | 1. Maximum Life, Intelligence 2. Lucky Hit: Up to a 15% Chance to Restore +# Primary Resource 3. Vulnerable Damage | |
| Helm | 1. + Ranks to Skeletal Warrior Mastery 2. Cooldown Reduction 3. Resistance to all Elements, Maximum Life, Armor 4. Intelligence | |
| Chest | 1. + Ranks to Golem Mastery 2. Essence per Second 3. Resistance to all Elements, Maximum Life, Armor 4. Life on Hit, Intelligence | |
| Gloves | 1. + Ranks to Skeletal Mages Mastery 2. Attack Speed 3. Chance to make enemies Vulnerable on hit 4. Critical Strike Chance | |
| Gloves (Best in Slot) | 1. + Ranks to Skeletal Mages Mastery | n/a |
| Pants | 1. + Ranks to Skeletal Mages Mastery 2. Essence per Second 3. Resistance to all Elements, Maximum Life, Armor 4. Life on Hit, Intelligence | |
| Pants (Best in Slot) | 1. You deal 50%[x] increased Critical Strike Damage to enemies affected by your Curses. | n/a |
| Boots | 1. + Ranks to Skeletal Warrior Mastery 2. Movement Speed 3. Resistance to all Elements, Maximum Life, Armor 4. Essence per Second | |
| Amulet | 1. + Ranks to Hellbent Commander 2.+ Ranks to Coalesced Blood 3. Attack Speed 4. Critical Strike Chance, Cooldown Reduction | |
| Rings | 1. Attack Speed 2. Critical Strike Chance 3. Cooldown Reduction 4. Intelligence | |
| Ring (Best in Slot) | 1. + Ranks to Skeletal Mages Mastery | n/a |
Gems and Runewords
We don’t recommend socketing items until level 45+ due to material cost and the fact that you’ll be replacing your gear too frequently, especially weapon.
If socket exists in gear already, you’ll use the following recommended gems:
- Weapon:
 Sapphire for increased Damage to Vulnerable.
 - Armor:
 Topaz for increased Intelligence.
 - Jewelry:
 Diamond for Elemental Resistances.
When it comes to Runewords, there are a couple that this build could utilize well. The most attractive combinations are:
 Igni +
  Wat – automates curse casting, until Aspect of the Cursed Aura found
 Cir +
Cir +  Thul – often casts
  Frost Nova, applying Vulnerable and increasing damage
 Feo +
Feo +  Ner – If you become Injured or Crowd Controlled you invoke the Rogue’s
  Countering Concealment – gain Dodge Chance, Movement Speed, Unstoppable and Stealth.
Make sure you slot these in your Helmet, Pants or Chest, since you will be replacing your weapon very frequently. You get runes back for free when salvaging item.
Season of Slaughter (Season 12)
Season of Slaughter introduces Bloodsoaked Sigils to “juice” the content, a Killstreak system with new Bloodied gear affixes relying on it, and even a temporary transformation into The Butcher himself.
Bloodied gear provides certain buffs, depending on the size of the killstreak or kill rate. While in possession of multiple useful pieces of Bloodied gear, to maximize the killstreak and kill rate – it is recommended to stay in World Tier where killing Elite enemies takes an insignificant amount of time.
In the long run, unless you’re lucky, Bloodied gear has little chance of meaningfully impacting the leveling process, since gear is replaced too often and its benefits need to be accumulated. Inconsistent impact of Bloodied gear buffs makes the totality of gear stats and especially weapon level – the priority.
Most impactful leveling Bloodied gear affect movement and casting speed, critical strike chance, survivability and extra drop rates:
- Feast: Every 25 Kills, gain Berserking for 4 seconds
- Rampage: +9% Movement Speed per Kill Streak Tier
- Rampage: +8% Attack Speed per Kill Streak Tier
- Rampage: +125 Maximum Life per Kill Streak Tier
- Rampage: +6% Critical Strike Chance per Kill Streak Tier
- Hunger: X% increased chance for Y during your Kill Streaks
Bloodsoaked Sigils empower the content and increase the rewards at the cost of increasing difficulty by approximately entire World Tier and threat of the Relentless Butcher.
This build neither affects nor is affected by transformation into The Butcher meaningfully, leaving it at the player’s discretion.
For a complete overview of Season 12, mechanics and theme, new leveling activity, and other changes coming, please take a look at our comprehensive season hub here.
Mercenaries
The mercenaries are nice, but not crucial addition to the game, so whichever one you choose to run is up to you. Aldkin helps to manage cooldowns by triggering ![]() Abhorrent Decrepify with
Abhorrent Decrepify with ![]() Flame Surge. Varyana improves skill rotation speed with
Flame Surge. Varyana improves skill rotation speed with ![]() Bloodthirst. Subo reveals enemies and resources on minimap for optimal routes.
Bloodthirst. Subo reveals enemies and resources on minimap for optimal routes.
The recommendation for this build will be to run Raheir, mostly because of extra survivability with ![]() Raheir’s Aegis and
Raheir’s Aegis and ![]() Valiance. We also recommend using the Reinforcement slot to level up all your mercenaries to get access to the caches for extra loot.
Valiance. We also recommend using the Reinforcement slot to level up all your mercenaries to get access to the caches for extra loot.
Below you’ll find the recommended skill set-up for Raheir:
Build Mechanics
Rotation and Playstyle
- If you are in danger, use
 Blood Mist. All negative effects from yourself will be removed and Unstoppable. Blood Mist can be ended early by pressing same button again.
 - Approach enemy pack at range of Aspect of the Cursed Aura or Igni Wat runeword cast range.
- Start sending Golem (Blood) into packs of enemies on cooldown.
- Ensure that there is
 Blight under targeted enemy pack for extra Corpse generation and cooldown reset via
  Abhorrent Decrepify.
 - When a Corpse is available, use
 Corpse Tendrils and Raise Skeleton on the Corpse to pull the enemies and buff your minions.
 - Activate
 Soulrift for extra damage and Essence gain if needed.
 - Repeat from Step 1.
Which Elixirs Should You Use?
To gain an edge in your adventures, head to the Alchemist in any major town, and craft any cheapest Elixirs that enhance your stats but more importantly experience gain for 30 minutes. Remember to gather the necessary crafting materials by foraging plants outdoors.
Return to the Alchemist again around every 10 levels to upgrade your potion. We have much less potions now, so extra healing is essential to survival.
Obol Gambling
Obol gambling is a great way to improve chances of finding Legendary Aspects or specific slot Uniques missing from your build. Most efficient obols farming methods can be found here. Check out the new tool guide from Icy Veins for gambling Obols in the link below.
Season Updates
There are no effective changes to the build besides the minor impact of seasonal mechanics. The current seasonal mechanics, being underwhelming compared to previous ones – result in a general net performance loss for every build.
For a complete overview of Season 12, mechanics and theme, new leveling activity, and other changes coming, please take a look at our comprehensive season hub here.
Difficulty and Endgame
This guide is designed to get you to level 60 in a smooth and enjoyable way. Once there, you’ll want to look at a proper endgame-designed build guide and start making required preparations. Make sure you pick one of our recommended ones!
Recommended World Tier to start: Hard
Quantity over quality is a road to success in leveling. Staying at a difficulty level where Elites and Seasonal content pose low threat and do not take any significant time to kill – nets the most experience. Moving upwards through World Tiers should happen when the requirements to unlock the next level become trivial.
Preparations for endgame build usually take some time to acquire required gear and will result in character unlocking paragon board after reaching level 60. To continue the progression and farm gear more efficiently – selected endgame build paragon board can be followed.
If fortune is not smiling on you – the estimated build progression limit reaches most of non-boss-related content of Torment IV World Tier.
Changelog
- March 7th, 2026: Guide updated for Season 12.
- December 11th, 2025: Reworked leveling build for Season 11, Divine Intervention
- October 5th, 2025: General visual improvements on the guide.
- September 27th, 2025: Reworked leveling build in to current Season 10 meta leveling using Chaos perks.
- September 23rd, 2025: Adjust seasonal powers and Book of the Dead for optimal speed.
- September 18th, 2025: Guide updated for Season 10.
- July 3rd, 2025: Optimized minor tweaks in the guide.
