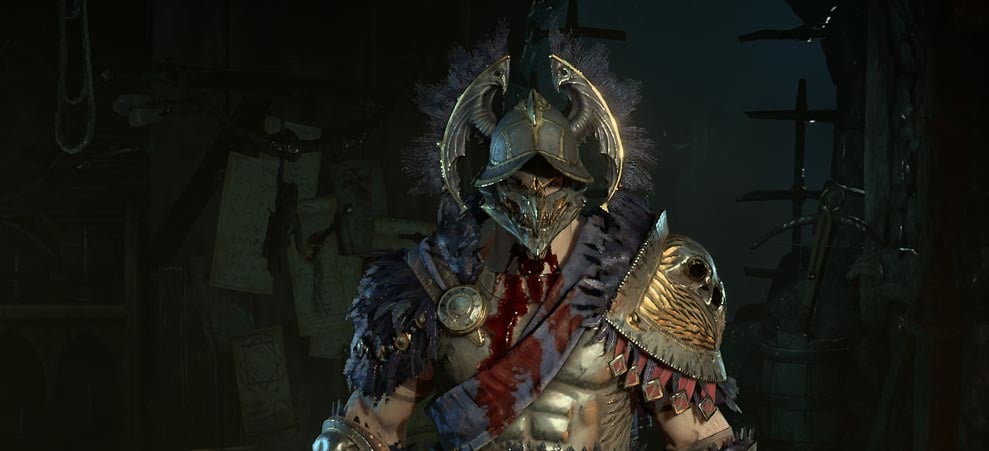
The best way to level a new Barbarian character during Season 11 is with our ![]() Whirlwind Barbarian, as it is easily able to clear large packs, and with the new buffs, can quickly mop up entire screens. However, as a reminder, any of the builds listed below will work for leveling, so play whatever fits your playstyle best!
Whirlwind Barbarian, as it is easily able to clear large packs, and with the new buffs, can quickly mop up entire screens. However, as a reminder, any of the builds listed below will work for leveling, so play whatever fits your playstyle best!
General Leveling Tips
The recommended difficulty to level on is Hard or Expert for the fastest experience. You can play on Normal, but with the changes to Helltide and the increased experience gain from 20% to 50%, we recommend Hard or higher in almost all cases due to the significant increase in leveling speed.
If you are playing on the seasonal realm, check out our season checklist for some useful tips and tricks to prepare you for Season 11 of Diablo 4. Don’t miss this chance to make the most out of your leveling journey!
You must complete the main storyline before you can engage in endgame activities, Nightmare Dungeons or the Tree of Whispers. If you have already completed the main storyline on another character, use the Campaign Skip feature in the character selection screen.
Getting a mount is an important step in your leveling journey, and we recommend saving your explorations of the world (such as for obtaining Altars of Lilith) for until after you get it. For more details, read our mount guide.
Season 11: Season of Divine Intervention
A new season comes with a new Season Journey which adds seasonal quest lines and content to help your journey. Renown makes its return for seasonal players only but in a much different form. Completing various tasks and earning seasonal reputation will allow you to gain the same benefits as the old renown system. You earn additional skill points at Season Ranks 1, 2, and 3 and earn additional Paragon Points at Season ranks 3, 4, 5, and 6. These points are the same totals as the old renown system but are now earned via this new Season Journey system.
Sanctuary Invaded
The Lesser Evils have invaded Sanctuary in Season 11 and alter different types of content throughout your journey in Season 11. Duriel invades Helltides adding his visage replacing the Blood Maiden at the large summoning circles, additionally Pangs of Duriel invade Helltides are drop rewards as well as hearts to summon Duriel himself. Azmodan invades World Bosses and can appear as one himself. Andariel invades Kurast Undercity and Belial invades The Pit as these are more endgame activities than leveling we won’t dive too much into those.
Helltides
Helltides appear on the map, taking over large swathes of land for one hour. During this time, monsters killed in the affected area drop a special temporary currency that can be used to unlock chests found in the Helltide area.
Participating in Helltides is highly recommended. They are available from the onset of a new character and are active for 55 minutes of every hour with 5 minutes of downtime before the next one spawns. They are a fantastic source of experience and gear provided you can survive to open the various chests throughout the Helltides
The revamped Helltides also come with a new mechanic, a threat meter that increases the more demons you slay while in it. It has three levels. Upon reaching the third level, you become Hell-Marked and a Hellborne spawn will attempt to hunt you down in a frenzy of demons summoned to your location. Your threat level in Helltide resets once the Hellborne ambush has been activated or if you die. Each threat level increases the frequency and danger of monster ambushes providing even more opportunities for experience and loot!
Strongholds
Throughout the world of Sanctuary, there are numerous zones with set levels of enemies within that need to be cleared to restore order to them. These are called Strongholds. There are 3 per zone. With the level revamp coming in Vessel of Hatred, not only is the Renown gained from completing them worth it, they now give massive amounts of experiences upon the first time you complete them sometimes granting a full level or more! It is highly recommended to clear the Strongholds as you make your way through Sanctuary for their renown, conveniences, and massive experience bonuses. A surefire way to level quickly and get into the endgame!
Fury, Barbarian’s Class Resource
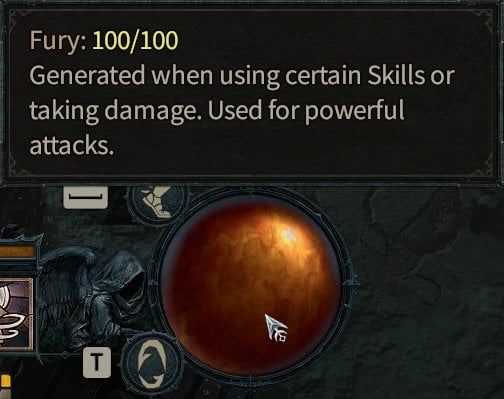
Fury makes a return in Diablo 4 as the Barbarian class resource, where it is functionally identical to its Diablo 3 counterpart.
Fury has a natural cap of 100 and slowly drains while out of combat. It is generated by casting spammable Basic Skills such as  Bash and expended by the more powerful Fury Skills such as
  Hammer of the Ancients. There are many other ways to generate Fury or improve its generation.
Arsenal System, Barbarian’s Class Mechanic
The primary unique class mechanic of the Barbarian is the Arsenal System, which allows the Barbarian to assign specific weapons to specific skills. This causes the Barbarian to automatically swap to the appropriate weapon upon casting the skill to which it is assigned. It should be noted that by default, the Barbarian is able to equip four weapons at once: A Two-Handed Bludgeoning (Mace), a Two-Handed Slashing (Axe, Polearm, or Sword), and a Dual-Wielded set (One-Handed Axe, Mace, or Sword).
The Arsenal System also allows the Barbarian to grow more experienced with the different weapon classes as they are used in combat. Each weapon class starts at Expertise Level 1 and features a unique effect that improves linearly with every Expertise level. Upon reaching the maximum Expertise level of 10, a bonus effect is also unlocked. The following table lists the effects for each weapon class.
| Weapon Class | Effect Per Expertise Level | Expertise Level 10 Bonus |
|---|---|---|
| One-Handed Axes | +10% increased Critical Strike Chance against Injured enemies. Double this amount when using two Axes. | Lucky Hit: Critical Strikes have up to a 55% chance to grant +0.6% increased Attack Speed for 2 seconds. Double the Attack Speed bonus when using two Axes. |
| One-Handed Maces | x1% increased damage to Stunned enemies. Double this amount when using two Maces. | Lucky Hit: Up to a 10% chance to gain Berserking for 1.50 seconds when you hit a Stunned enemy. Double this chance when using two Maces. |
| One-Handed Swords | Lucky Hit: Up to a 1% chance to gain 5 Fury when hitting a Crowd Controlled enemy. Double this chance when using two Swords. | Killing a Crowd Controlled enemy grants +15% increased Attack Speed for 3 seconds. Double this amount for kills with two Swords. |
| Polearms | x15% increased Lucky Hit Chance. | You deal +15% increased damage while Healthy. |
| Two-Handed Axes | x1.5% increased damage to Vulnerable enemies. | +10% increased Critical Strike Chance against Vulnerable enemies. |
| Two-Handed Maces | Lucky Hit: Up to a 1% chance to gain 5 Fury when hitting an enemy. Double the amount of Fury gained while Berserking. | You deal x15% increased Critical Strike Damage while Berserking. |
| Two-Handed Swords | +2% of direct damage you deal is inflicted as Bleeding damage over 5 seconds. | You deal x30% increased Bleeding damage |
In addition, the Technique Slot allows you to benefit from one of the above effects at all times, regardless of which weapons are equipped. The ability to use the Technique Slot requires the completion of a short questline in the Dry Steppes obtained after reaching Level 15.
Secondary Barbarian Class Mechanics
Berserking
Berserking is a temporary positive effect that increases damage by 25% and movement speed by 30%. Being exclusive to the Barbarian, Berserking is featured prominently in many of their skills and passive skills.
Barbarian Weapons and Restrictions
The Barbarian may dual-wield One-Handed Weapons (Axes, Maces, Swords) and Two-Handed Weapons (Axes, Maces, Polearms, Swords). The Barbarian does benefit from the stats of weapons that are equipped in those additional slots even if they are not currently holding them in their hands.
Barbarian Skills and Passive Skills
This section provides an overview of the main skill categories for the Barbarian.
For a detailed list of all Barbarian skills and passives, refer to the pages below.
Barbarian Skill Categories
Basic Skills
Basic Skills are spammable skills whose primary purpose is to generate Fury for skills of the Core category. By virtue of being free and having no cooldown, they are also used to fill dead time while waiting for other, more powerful skills to be available.
The Basic Skills for the Barbarian are  Bash,
Bash,  Flay,
Flay,  Lunging Strike, and
  Frenzy.
Core Skills
Core Skills are the main sources of damage of the Barbarian. Although they have no cooldown, the main limiting factor of Core Skills is their Fury cost.
The Core Skills for the Barbarian are  Hammer of the Ancients,
  Rend,
Rend,  Upheaval,
  Double Swing, and
  Whirlwind.
Defensive Skills
Defensive Skills revolve around protecting the Barbarian and their allies through powerful protective effects or crowd control.
The Defensive Skills for the Barbarian are  Challenging Shout,
  Ground Stomp,
  Iron Skin, and
  Rallying Cry.
Brawling Skills
Brawling Skills provide a wide array of utility, including mobility.
The Brawling Skills for the Barbarian are  War Cry,
  Kick,
Kick,  Leap, and
  Charge.
Weapon Mastery Skills
Weapon Mastery Skills are situational but powerful offensive skills with a relatively long cooldown.
The Weapon Mastery Skills for the Barbarian are  Rupture,
  Death Blow,
 ![]() Mighty Throw (New IN Vessel of Hatred!) and
Mighty Throw (New IN Vessel of Hatred!) and  Steel Grasp.
Ultimate Skills
Ultimate Skills are extremely powerful skills with a cooldown to match. Their use is typically reserved for dispatching powerful enemies. Only one Ultimate Skill may be equipped at a time.
The Ultimate Skills for the Barbarian are  Wrath of the Berserker,
  Iron Maelstrom, and
  Call of the Ancients.
Barbarian Dismount Skill
While mounted, the Barbarian has access to a unique Dismount Skill which causes the Barbarian to jump off their mount and slam into the ground twice, dealing damage to and stunning nearby enemies.
Barbarian Attributes
The four core attributes benefit each of the five classes in slightly different ways. Here are their effects on the Barbarian.
| Attribute | Effect 1 | Effect 2 | Effect 3 |
|---|---|---|---|
| Strength* | 1.1% Damage per 10 Points | 1 Armor per point | |
| Intelligence | 5% All Resistances per 100 points | ||
| Willpower | 10% Resource Generation per 100 points | 10% Healing Received per 100 points | 25% Overpower Damage per 100 points |
| Dexterity | 2% Critical Strike Chance per 100 points | 2.5% Dodge Chance per 100 points |
Endgame Barbarian Builds
The leveling builds listed at the top of this page are designed to take your Barbarian to Level 50. Afterwards, you should use an endgame build guide to allocate Paragon points and equip gear with the best stats and Aspects. The following endgame builds will help you optimize your character for the paragon grind at maximum level (60).
Endgame Activities
Finish the storyline to unlock the various endgame activities in Diablo 4. Follow the yellow-marked quests, and you should have no trouble finding your way.
After finishing the main storyline, the game becomes quite open-ended. The following sections provide a quick list of the activities you should do, in approximate order.
Tree of Whispers
The Tree of Whispers, located in Hawezar, rewards you for completing bounties found all over the game world. These are generally profitable activities that reward you with experience and items. They can be completed while doing other events and activities in a zone.
The Tree of Whispers is also your first source of Nightmare Sigils, used to activate Nightmare Dungeons. They are not guaranteed to drop, so keep turning in Whispers of the Dead until it appears.
Nightmare Dungeons
Nightmare Dungeons are one of the main endgame activities in Diablo 4. Once you receive your first Nightmare Sigil from the Tree of Whispers, you can start clearing these dungeons. Nightmare Sigils continue to drop in Nightmare Dungeons, so you should never run out.
Nightmare dungeons are an essential part of the endgame (since their difficulty has a lot of potential for increase), providing you with a challenge in return for which you can receive great item rewards as well as your glyphs for the Paragon system. They also provide a source for Masterworking materials which you will need to maximize the power of your items as you near the endgame.
Complete Renown in All Zones
Complete the remaining Renown stages in all of the zones.
Although Renown bonuses provide some Skill and Paragon Points, character power grows faster from leveling and finding gear upgrades. Completing Renown can be quite time consuming, so you should delay it until you are well geared with many aspects and tempers across your gear and are close to level 60.
Legion Events and World Bosses
Legion events and World Bosses are marked on the map. They are worthwhile activities to engage in, since they reward potentially good items.
Legion events are also good experience. Simply go to the marked area on the map and join other players in killing the enemies.
The Pit
The Pit is another type of endgame content, similar to Diablo 3’s Greater Rifts, which can be entered through a portal that is opened by a pillar located in Cerrigar. It is the primary source of both Glyphs and Glyph experience making it one of the most important endgame activities to run.
After reaching Level 60, you can enter The Pit. Completing the Pit unlocks deeper and deeper depths into its abyss. Upon completion of a Level 20 Pit, you will unlock Torment difficulty which grants access to Tormented Bosses, powerful Uniques and more challenges and greater rewards befitting of your journey beyond Level 60.
The Pit has hundreds of tiers of difficulty, and the current highest tier you can unlock is Level 150.
